Four UR10s with grippers
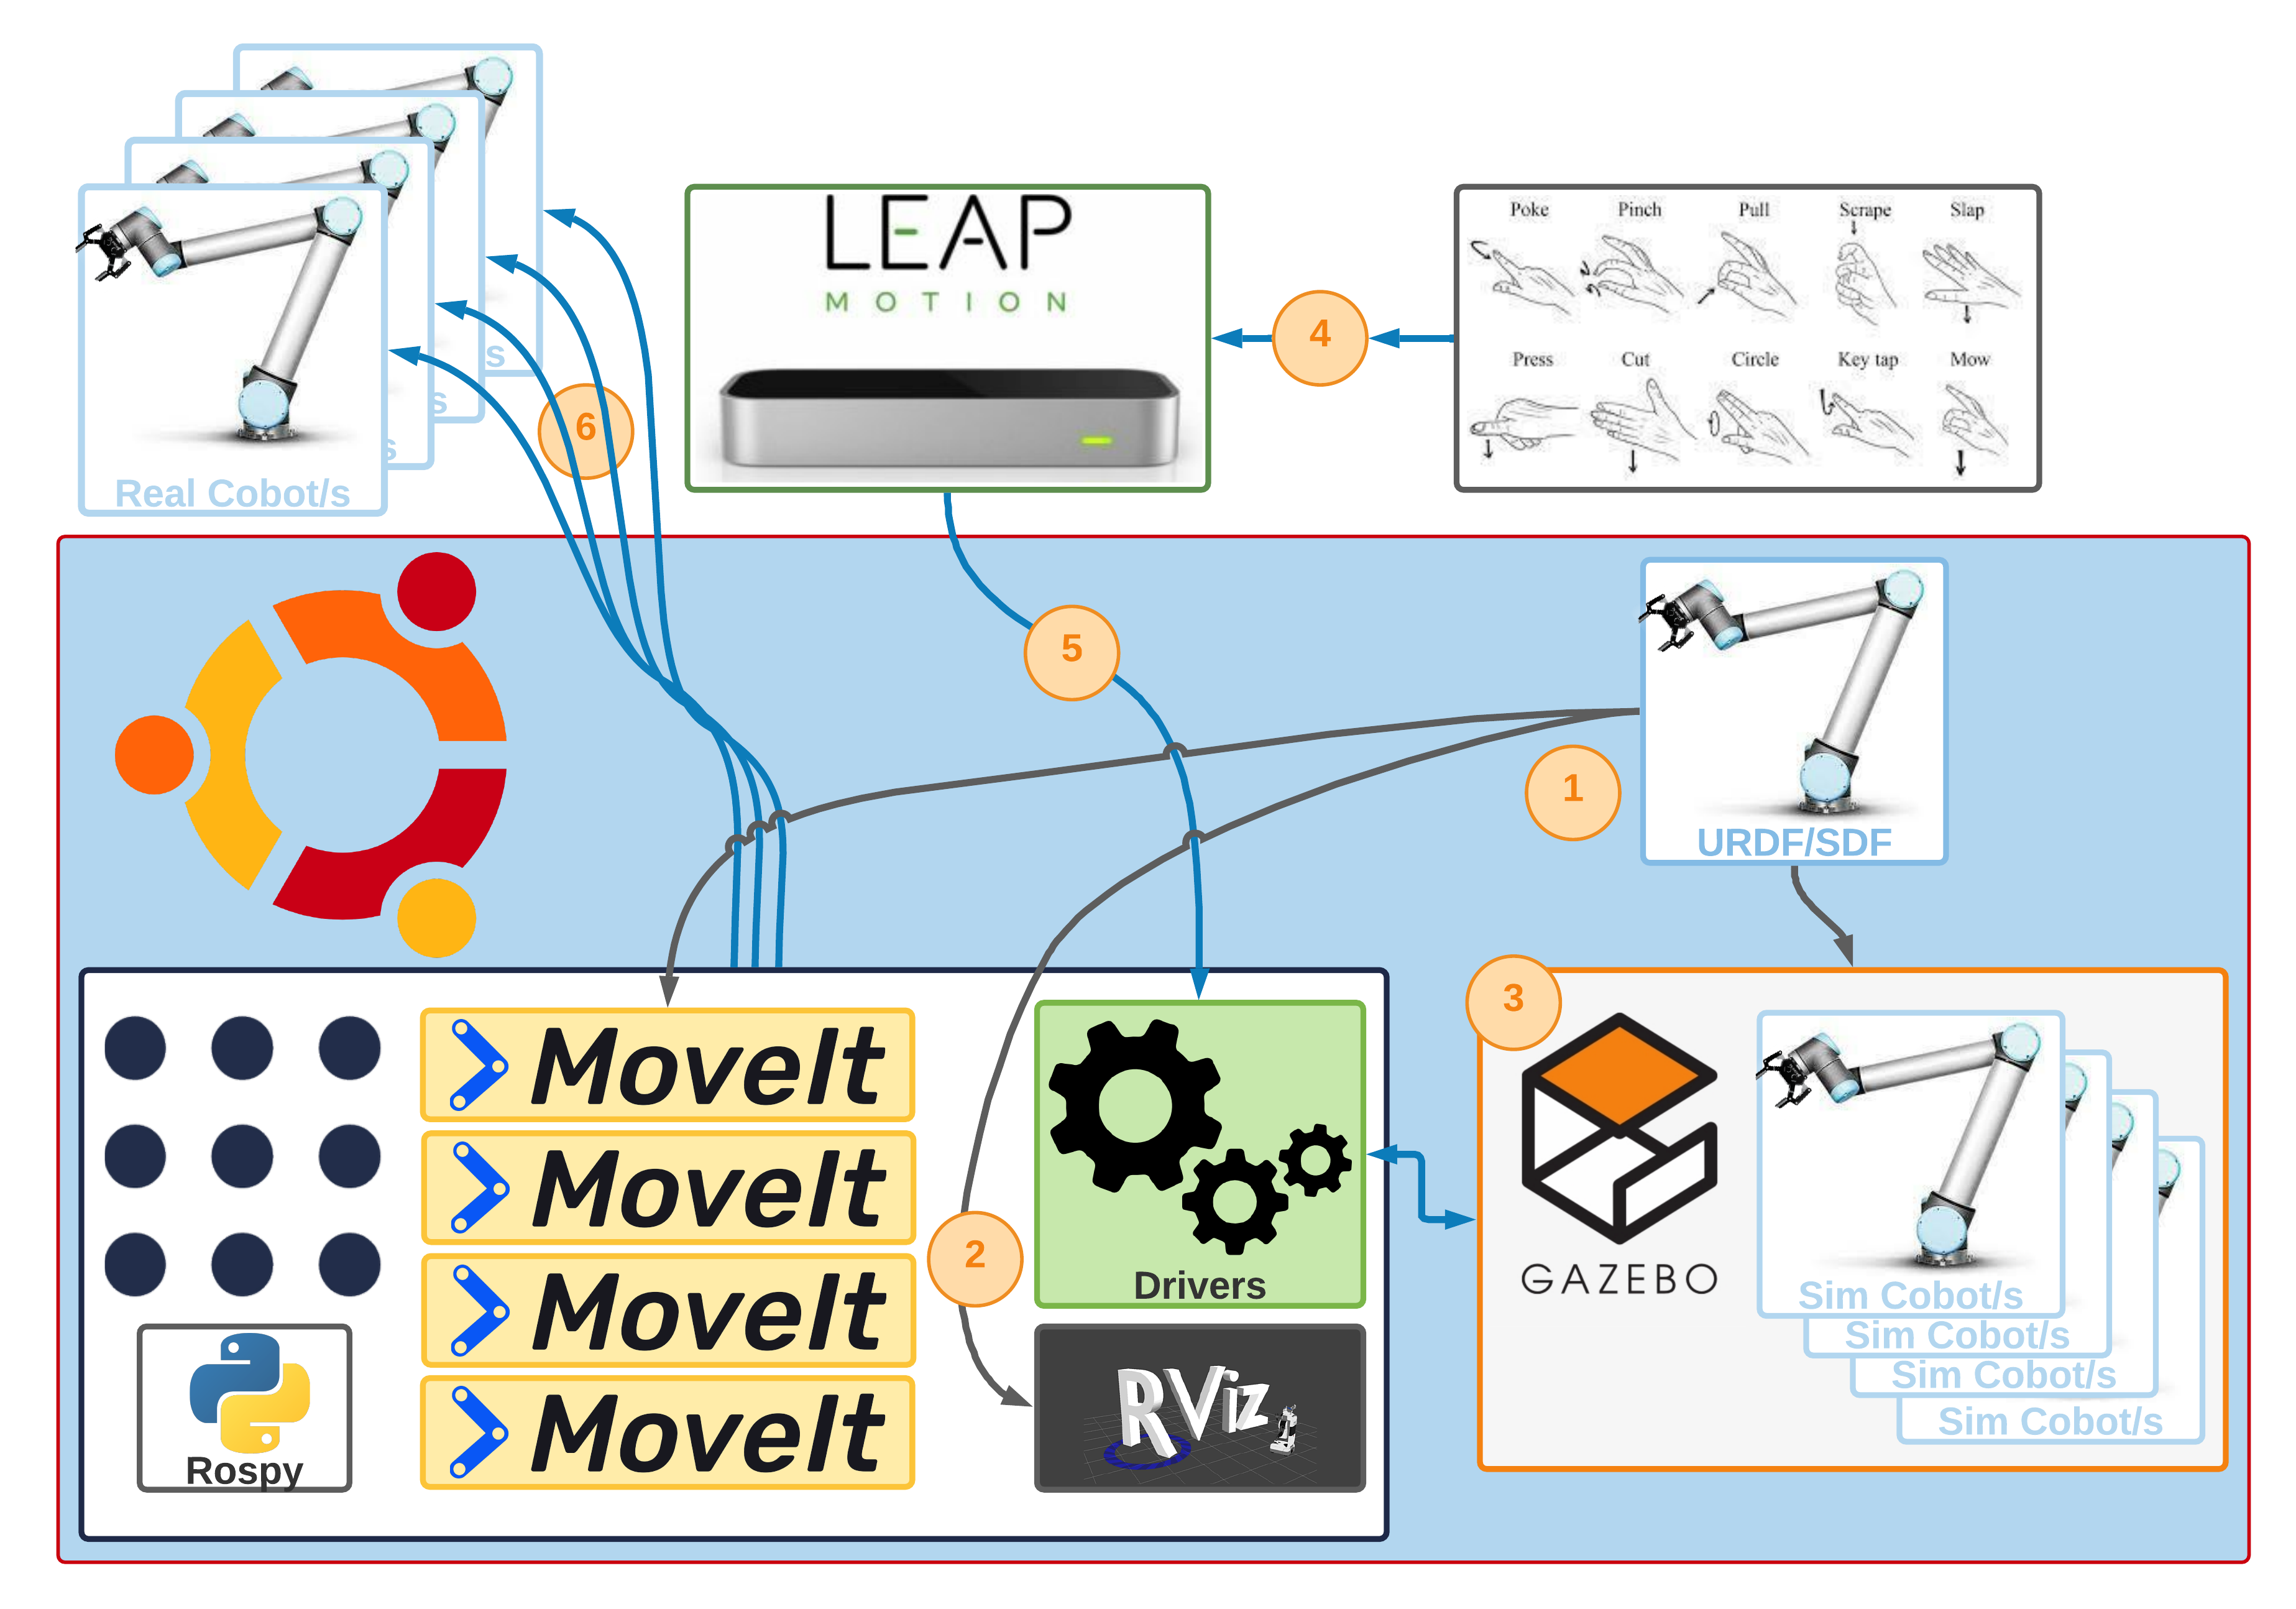
The solution is going to be carried out for four robots this time, in the same way that it has been carried out for one, but modifying the content of the files, adapting it for simulation with four robots.
Prerequisite
- Successfully install the Basic System Configuration.
- Implement the Solution for one robot without the
MoveIt!motion planner.
Index
Initial setup: Setup for a robot
In this section, a replication of the configuration for a single robot is made, from which it is taken as a base and thus later explains the modifications made to be able to control four robots.
 File content
Do not blindly copy and paste the contents of the files into this section. During the explanation for the configuration for a robot, the information is identical to what you get from the package one_arm_moveit, but you have to modify the content to fit the new package, in this case four_arm_moveit.
There are two options:
- If you have done the solution for a robot one_arm_moveit, you can continue on what implemented, but in the modifications section you have to change four_arm_moveit to one_arm_moveit.
- If the solution for a one_arm_moveit robot has not been done, you can follow the steps presented in this section, but keep in mind that the contents of the files in this phase of initial configuration are linked to the files of one_arm_moveit and therefore when making the copy of this you have to replace references to package one_arm_moveit with four_arm_moveit
If this information is not taken into account, the package will not compile correctly and the compiler itself will force a choice between one of the previously suggested options.
Phase 1: URDF configuration
 Description of the file URDF
The URDF (United Robotics Description Format) file models the cobot in XML format, which is used by the various applications that ROS requires, but mainly to perform a simulation of the modeled robot.
The file is built in the form of a tree in which there are three main tags: <robot>, <link> and <joint>. For clarification, you can take the arm of the human body as a reference. If you want to model the arm of a person, the tag <robot> stands for the arm as a whole. This arm consists of several bones (humerus, ulna and radius) represented by the tags <link> and a joint connecting these bones (elbow) represented by the tag <joint>.
As with bones, additional information can be added to these tags, providing information about size, geometry, inertia, orientation, etc. Finally, the modeling of a robot can be connected to another model to form a more complex model that can be represented by adding the hand to the arm, where the wrist is a joint that connects the two. Note that <joint> tags are connected to <link> tags via a parent-child relationship.
In this way, a representation of the robot components is created:
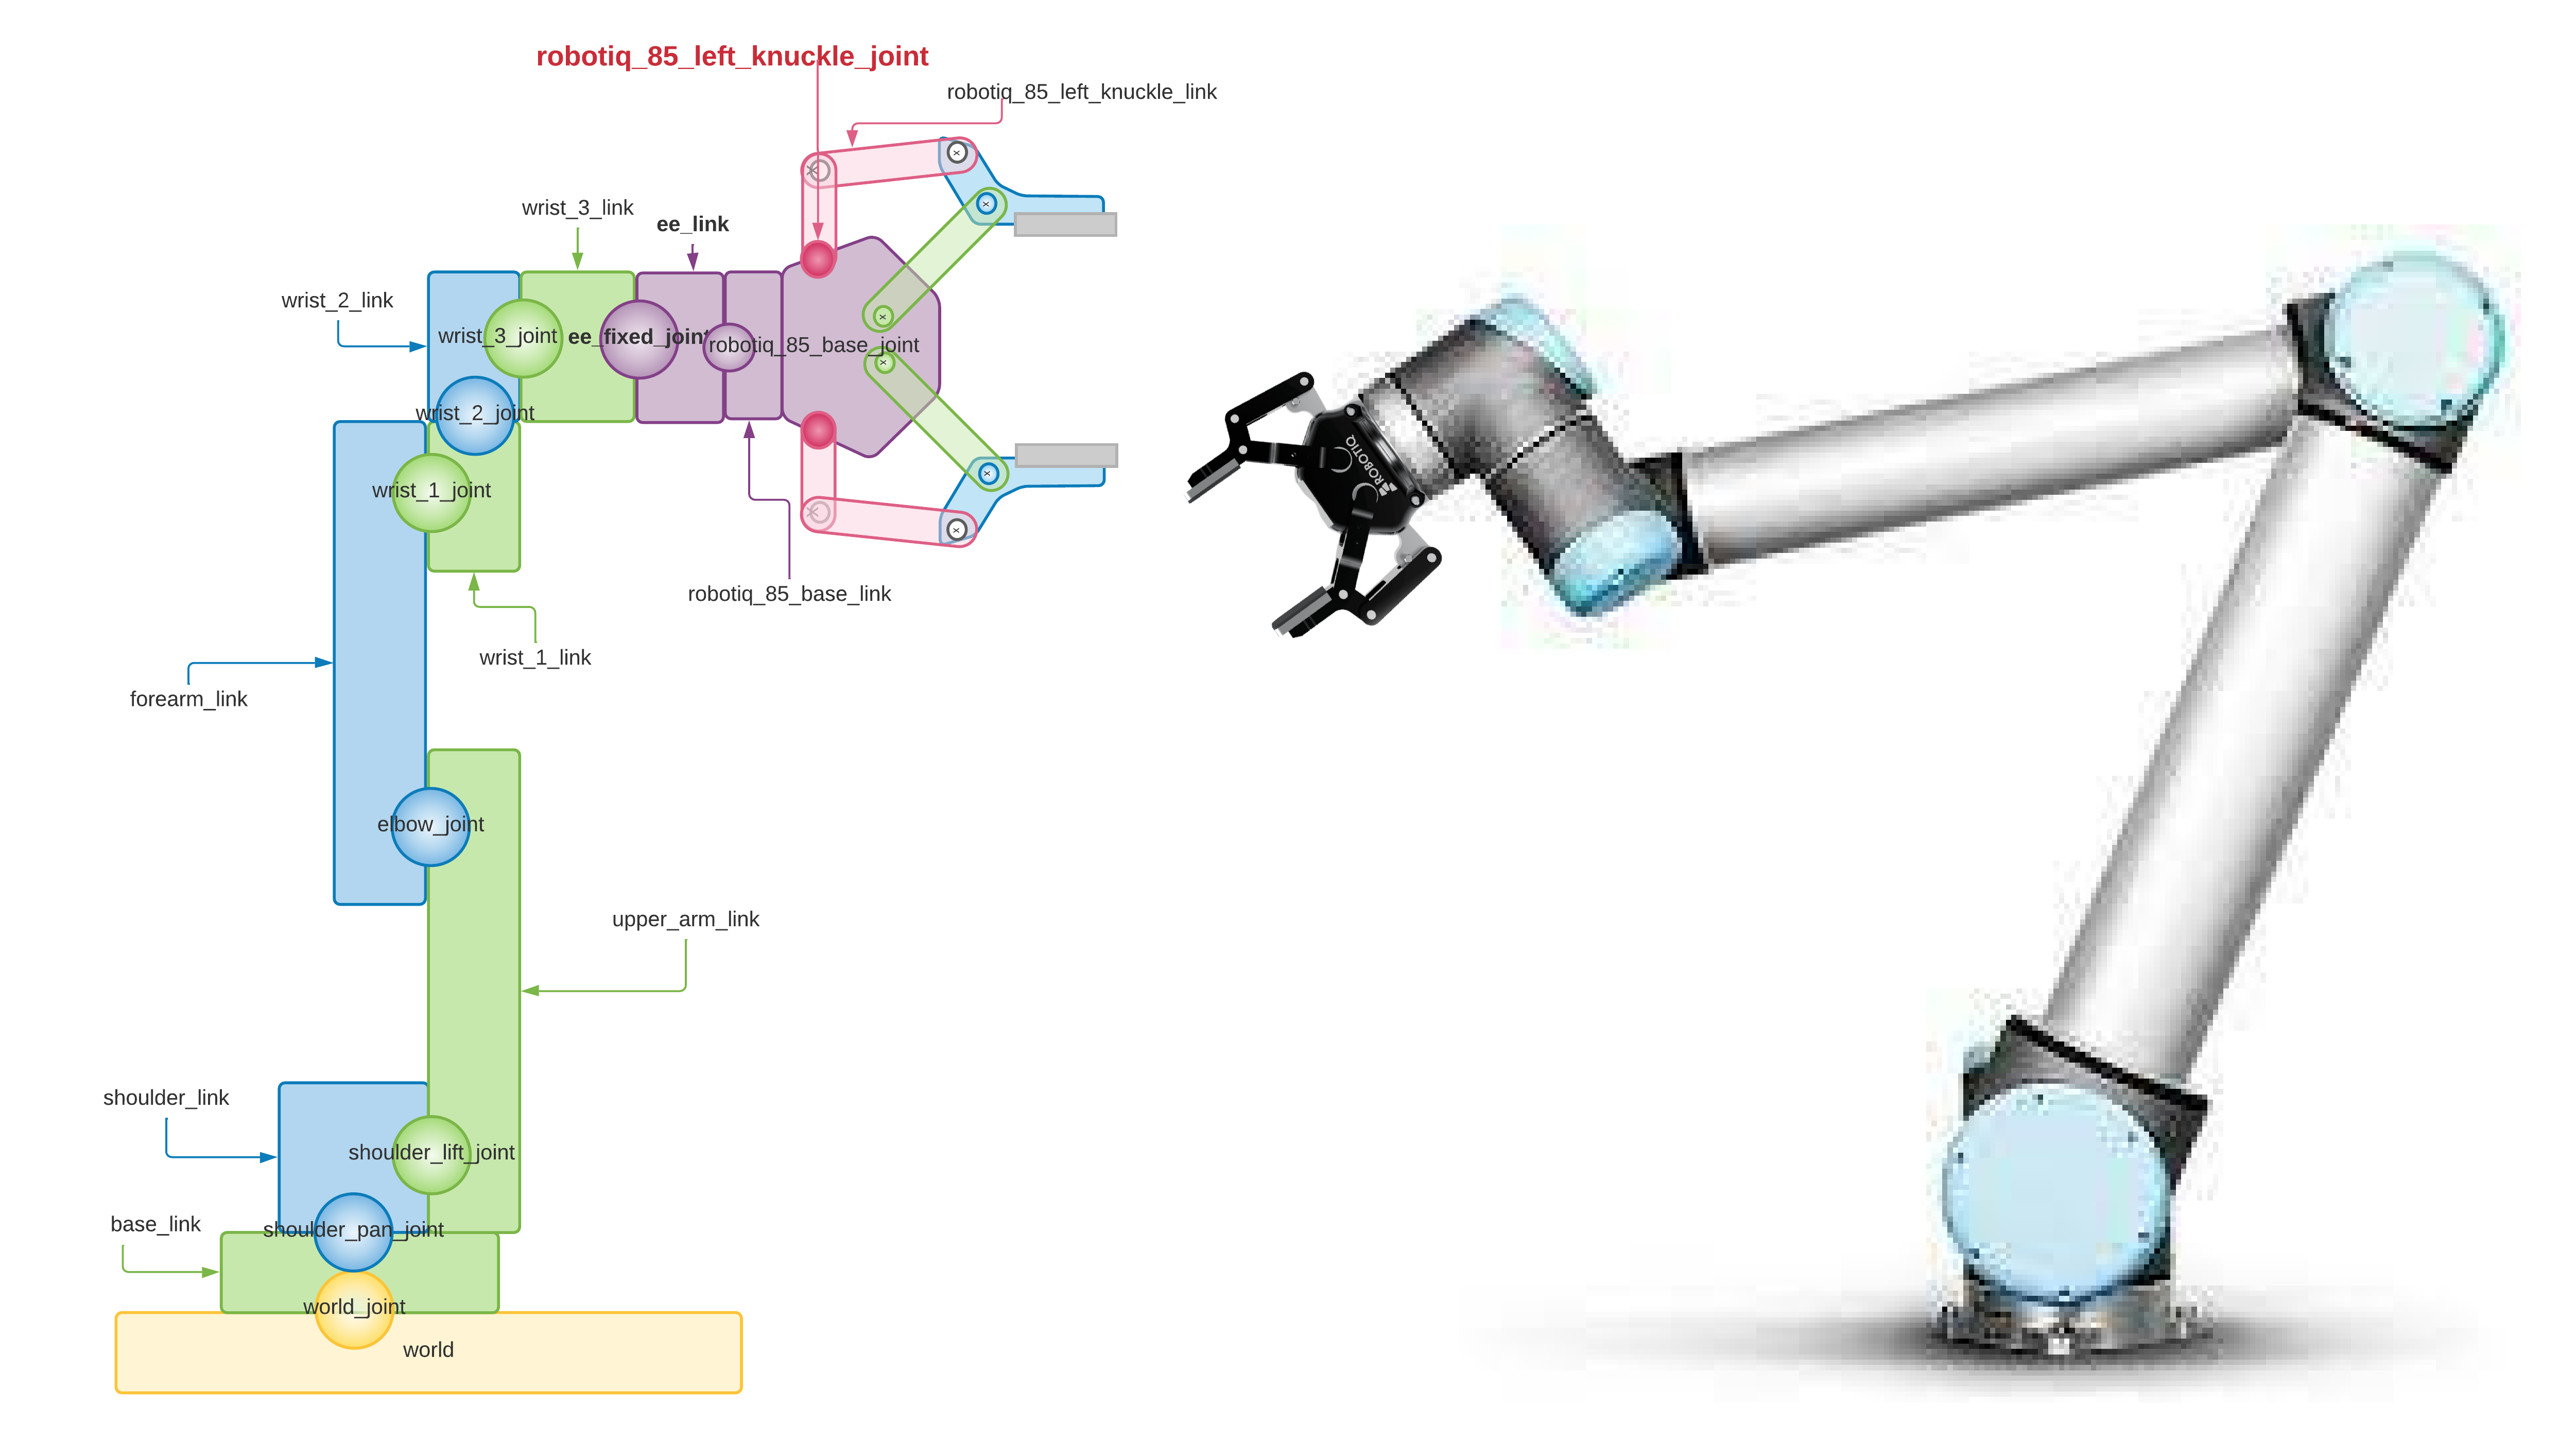
The image shows the contents of the URDF file that models the robot next to the gripper. You can see how the component of the UR10 robot arm is connected to the link world which represents the world (yellow color) and the base of the UR10 arm base_link (green color) which is directly above it, also the joint world_joint is the yellow ball located between both links. In the same way, the component of the gripper robotiq_85_gripper is connected to the arm of the UR10 (ur10_robot). The ball representing the joint robotiq_85_base_joint connecting both components (purple color) connects the link robotiq_85_base_link of the gripper with the link ee_link of the UR10 arm.
 Create solution directory
cd ~/MultiCobot-UR10-Gripper/src/multirobot
mkdir four_arm_moveit
 Description of the directory configuration
A new package is created and the four_arm_no_moveit project directories are copied for later editing.
cd ~/MultiCobot-UR10-Gripper/src/multirobot/four_arm_moveit
catkin_create_pkg four_arm_moveit_description rospy
The four_arm_no_moveit_description directory and the launch and urdf folders are copied to the directory created for description.
cd ~/MultiCobot-UR10-Gripper/src/multirobot/four_arm_moveit/four_arm_moveit_description
cp -r ~/MultiCobot-UR10-Gripper/src/multirobot/four_arm_no_moveit/four_arm_no_moveit_description/launch .
cp -r ~/MultiCobot-UR10-Gripper/src/multirobot/four_arm_no_moveit/four_arm_no_moveit_description/urdf .
 Modification of the description files
-
multirobot/four_arm_moveit/four_arm_moveit_description/launch/ur10_upload.launch
-
multirobot/four_arm_moveit/four_arm_moveit_description/urdf/ur10_robot.urdf.xacro
-
multirobot/four_arm_moveit/four_arm_moveit_description/urdf/ur10_joint_limited_robot.urdf.xacro
It compiles:
cd ~/MultiCobot-UR10-Gripper
catkin_make
Phase 2: Configuring MoveIt!
Configuration of MoveIt!
Before configuring with the Setup Assitant, you must already have the URDF well defined. Therefore the Setup Assitant configuration is started with the following command in the terminal:
cd ~/MultiCobot-UR10-Gripper/src/multirobot/four_arm_moveit/
mkdir four_arm_moveit_config
roslaunch moveit_setup_assistant setup_assistant.launch

MoveIt! Setup Assistant
The URDF file is selected as the robot model: multirobot/four_arm_moveit/four_arm_moveit_description/urdf/ur10_joint_limited_robot.urdf.xacro (could be perfectly be ur10_robot.urdf.xacro).
-
When you start the
Setup Assitantconfiguration, you must tell it where the fileUR10_joint_limited_robot.urdf.xacrois located, the model of the robot you want to configure: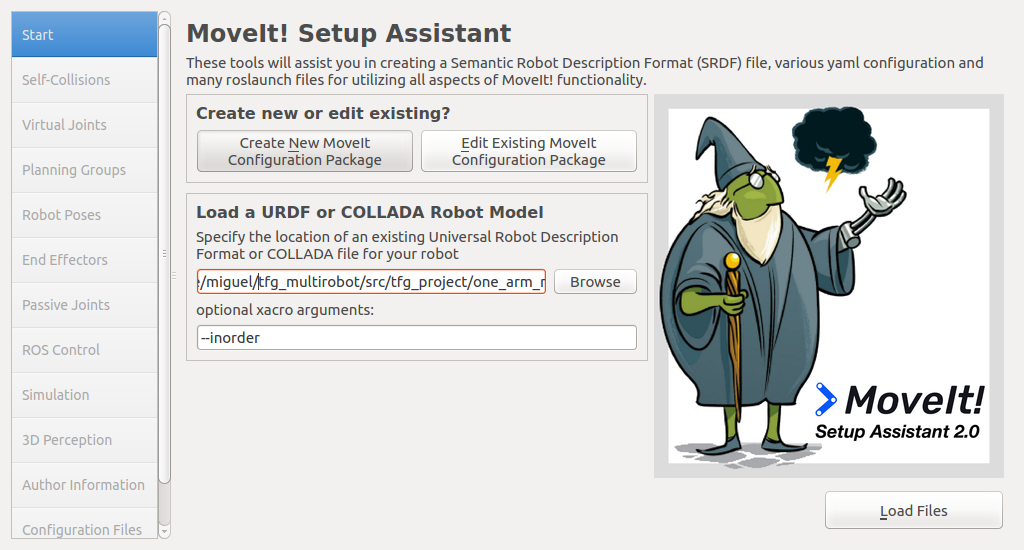 .
. -
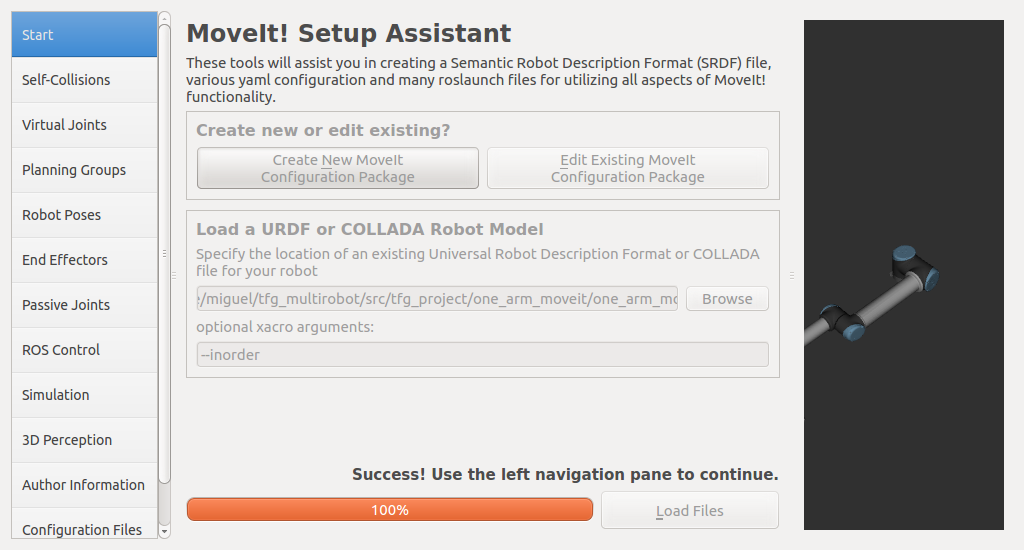
Then the Load files button is specified.
-
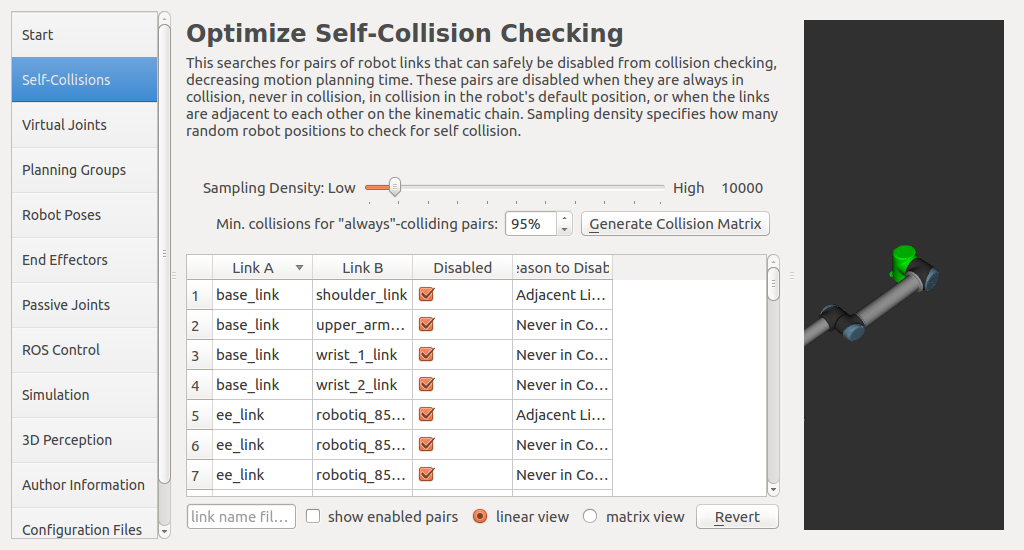
On the Self Collisions tab, click on the Generate Collision Matrix button. This will create a matrix between the various robot components that may cause a self-collision during trajectory planning:
-
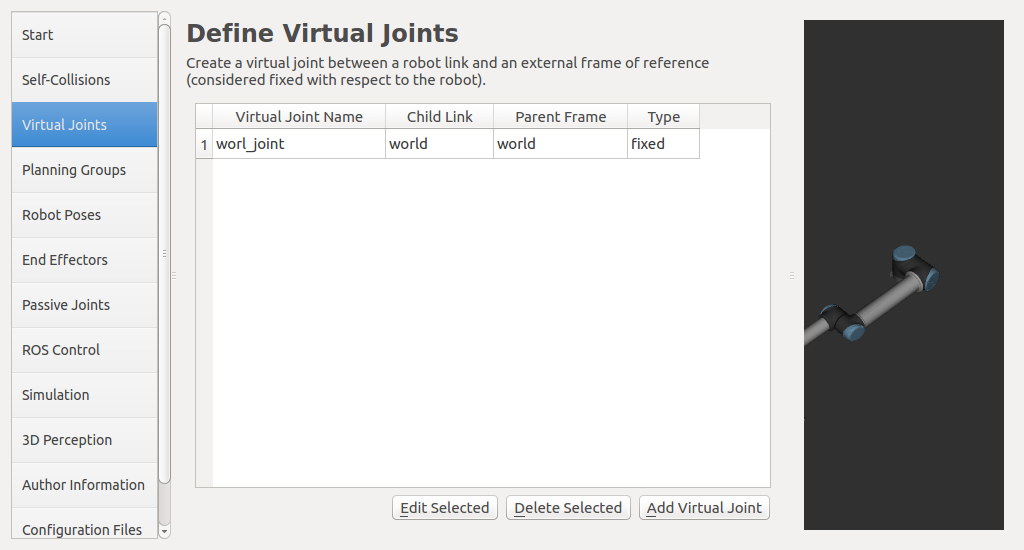
The Virtual Joints tab is specifically for robot arms installed on a mobile base. In this case it does not affect the configuration as the base is fixed, but for future configurations a joint must be created between the robot
base_linkand theworldframe with the following configuration: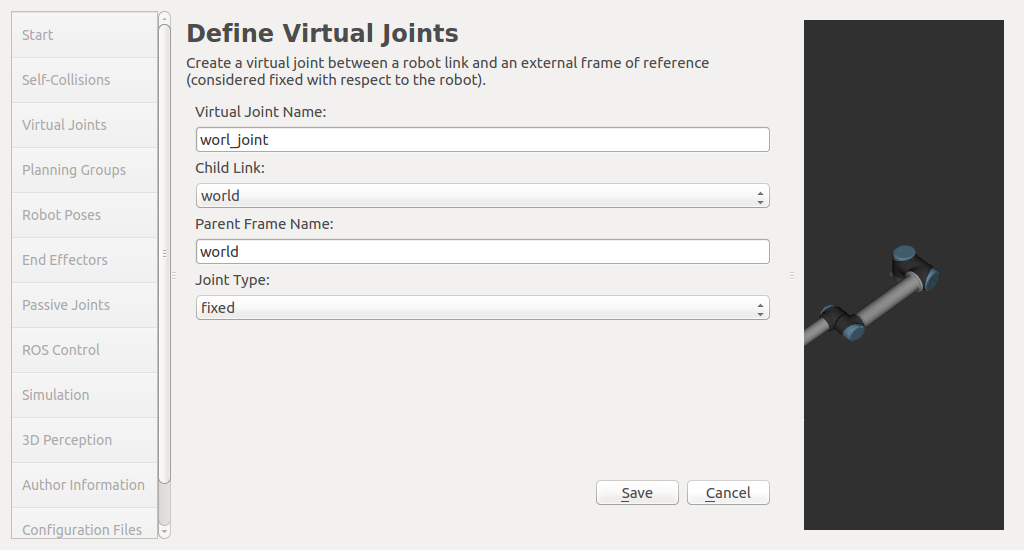
-
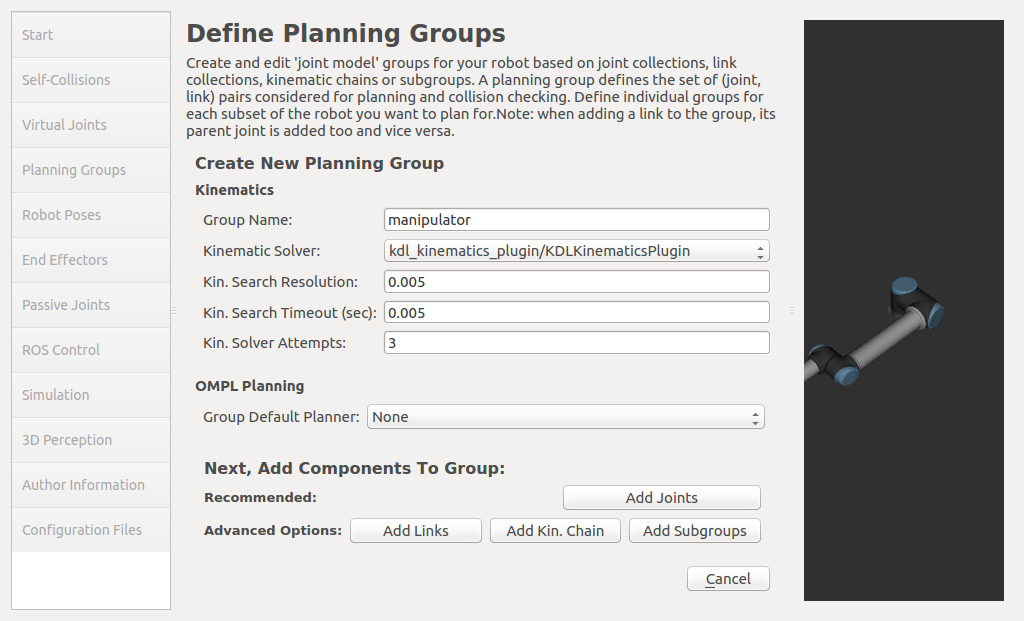
One of the most important tabs is the definition of planning groups. In this case, there are two groups: the manipulator group, which controls the robot arm, and the gripper group, which controls the gripper:
-
Then you need to click on the Add Kin. Chain button:
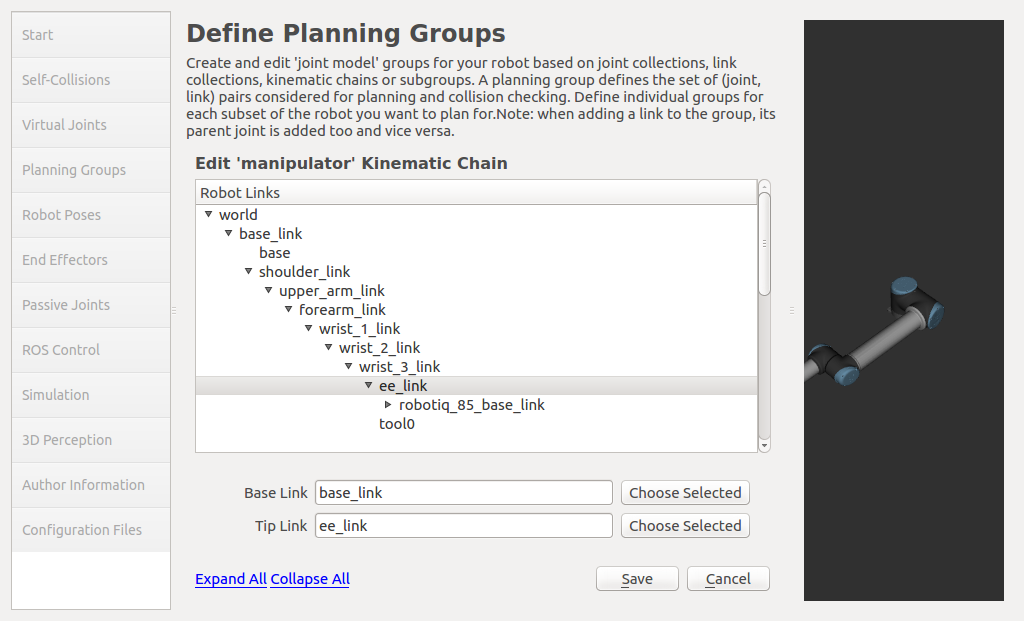
-
Finally the configuration is saved:
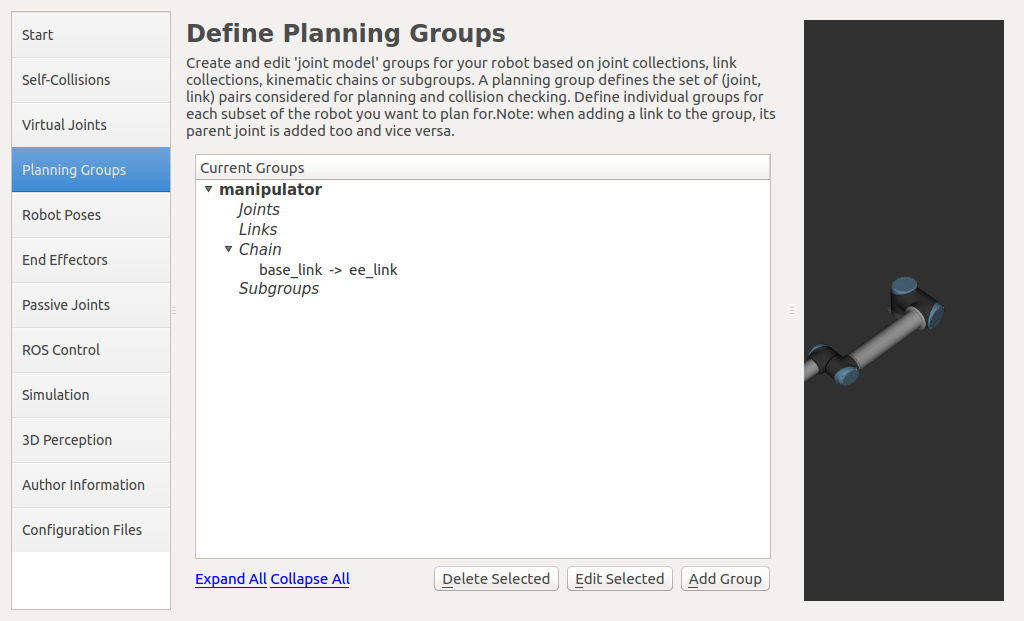
-
Now you need to do this for the gripper group that will control the gripper. Click the Add Group button, enter the name of the group, and enter kdl as Kinematic Solver:
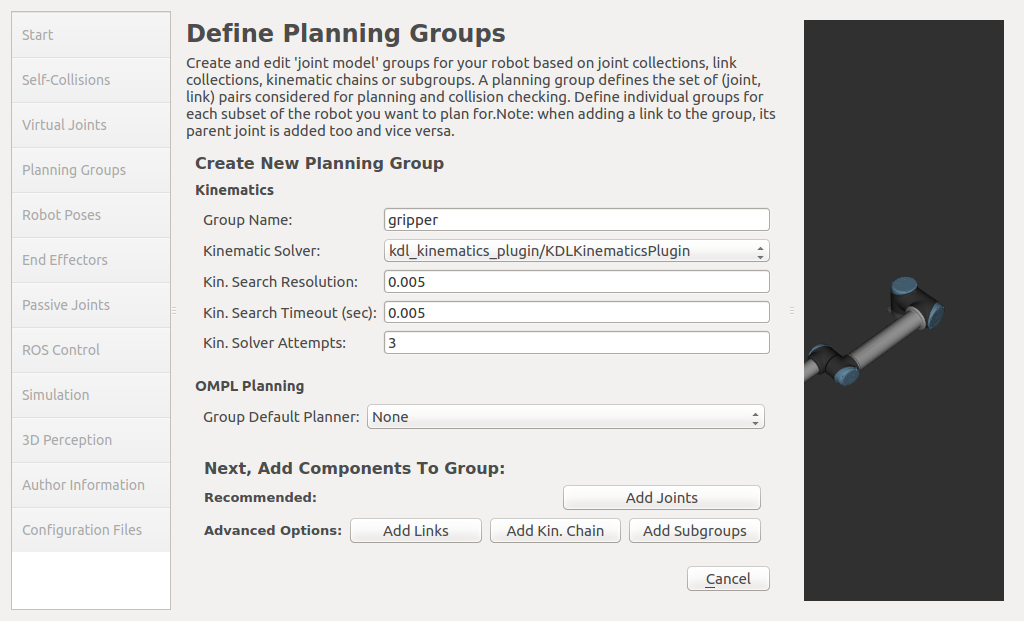
-
After clicking the Add joints button, you need to search for robotiq_85_left_knucle_joint and add it with the arrow ->:
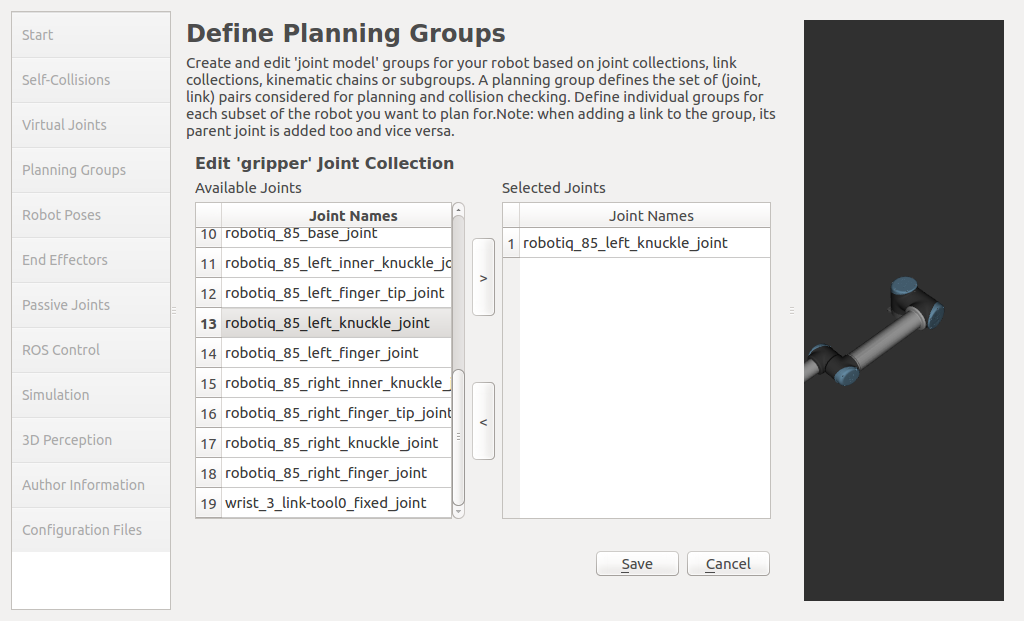
-
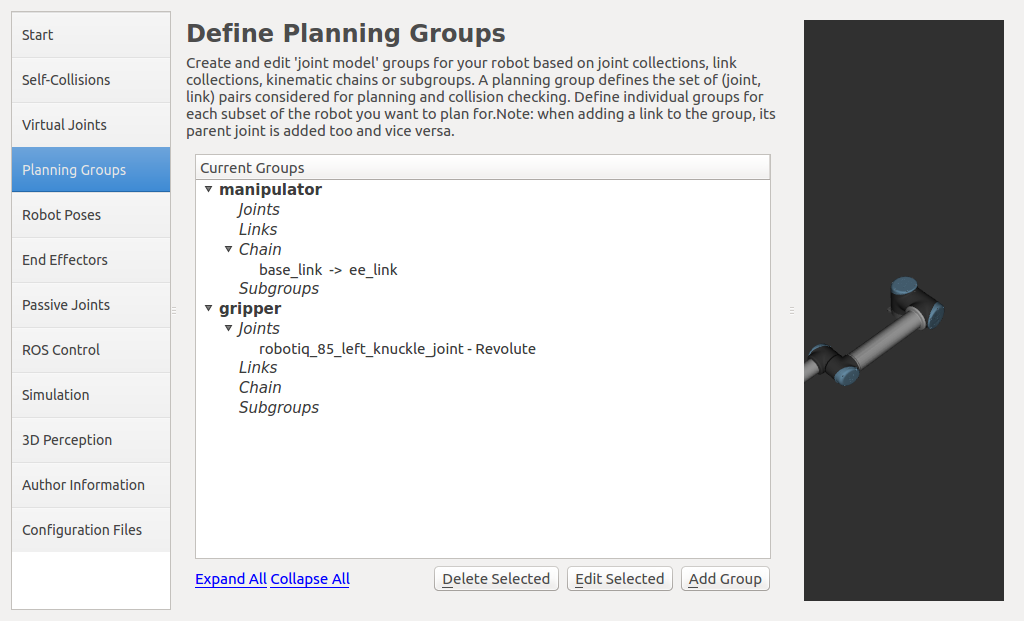
After saving, the result on the Planning group tab should look like this:
-
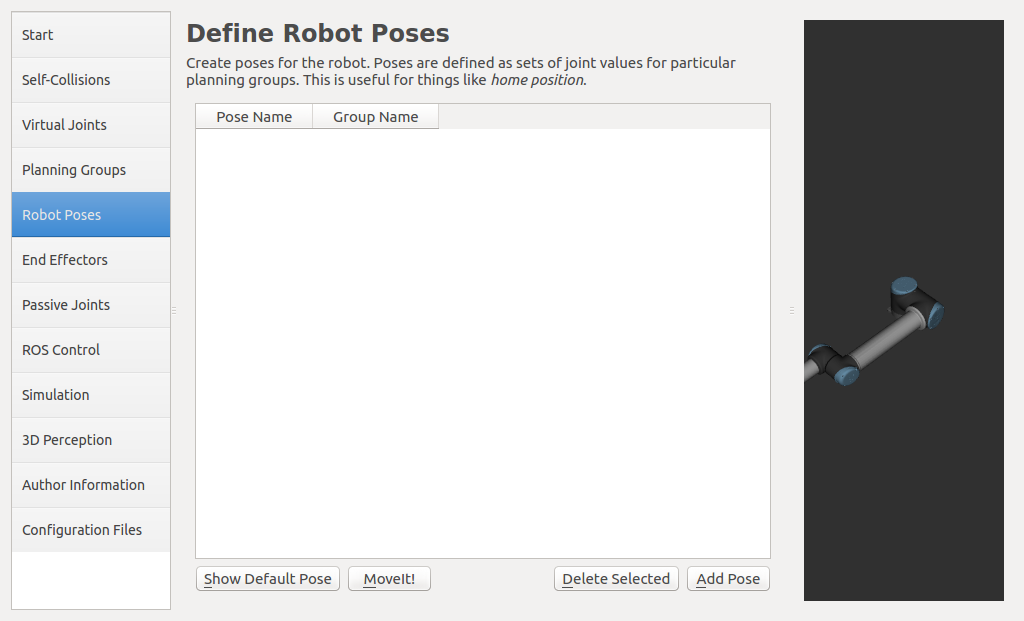
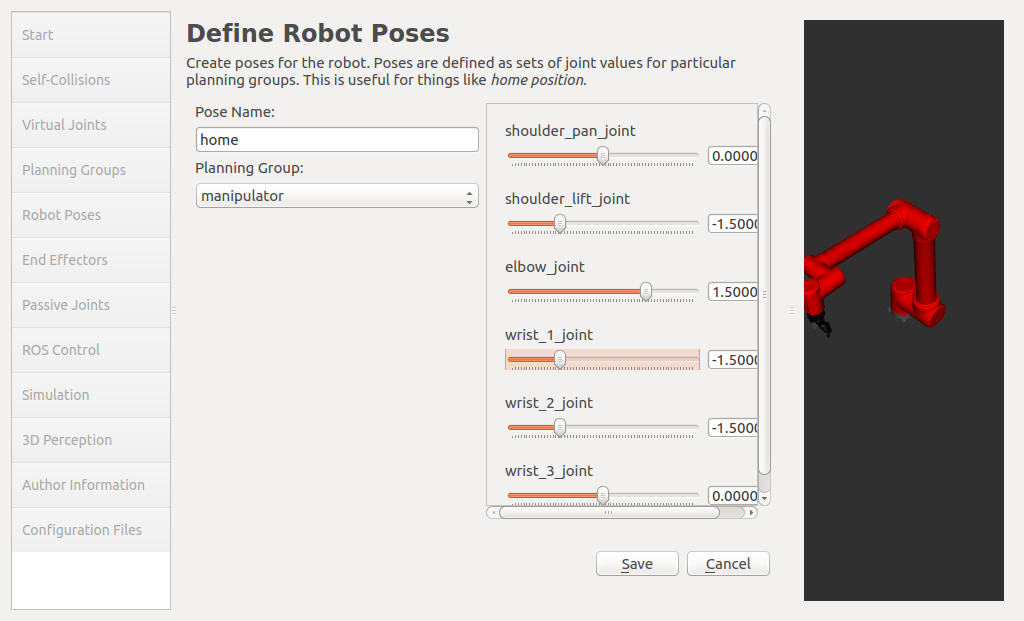
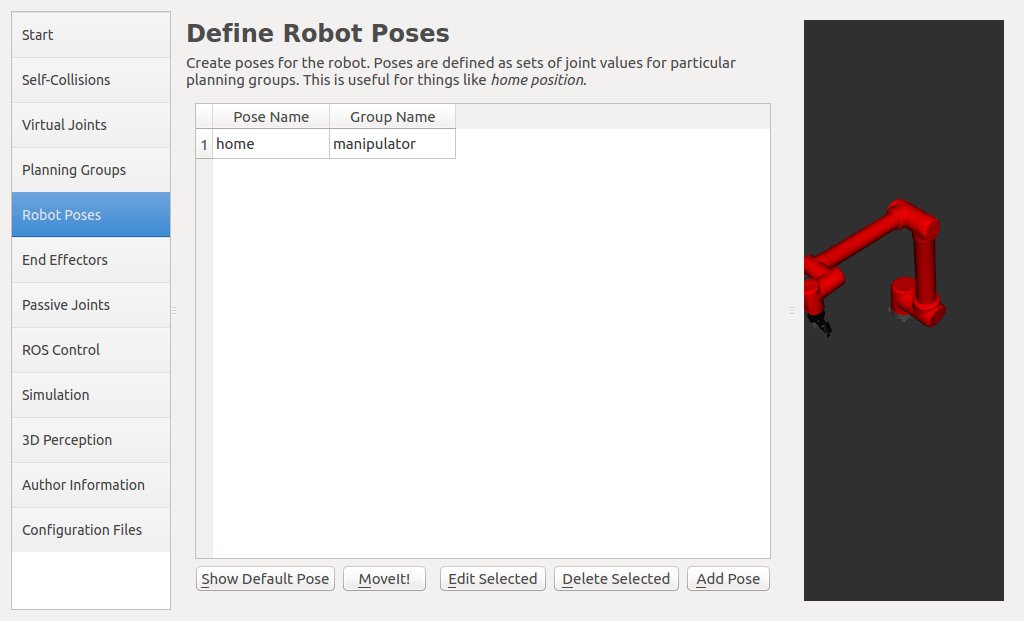
The Robot Poses tab is used to configure fixed poses in the robot in advance. The home pose is configured to reflect the initial position of the robot:
-
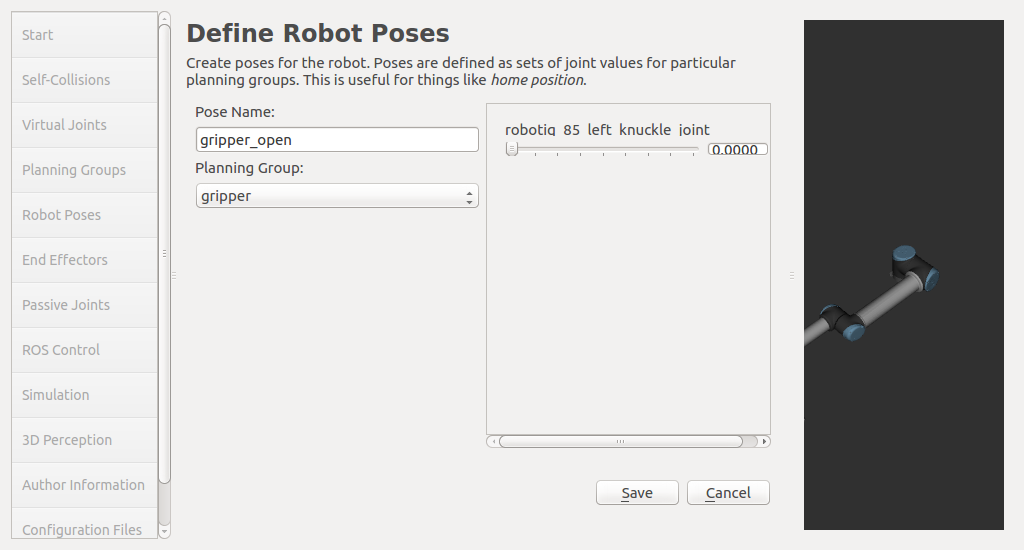
On the Robot Poses tab, the gripper_open pose is configured:
-
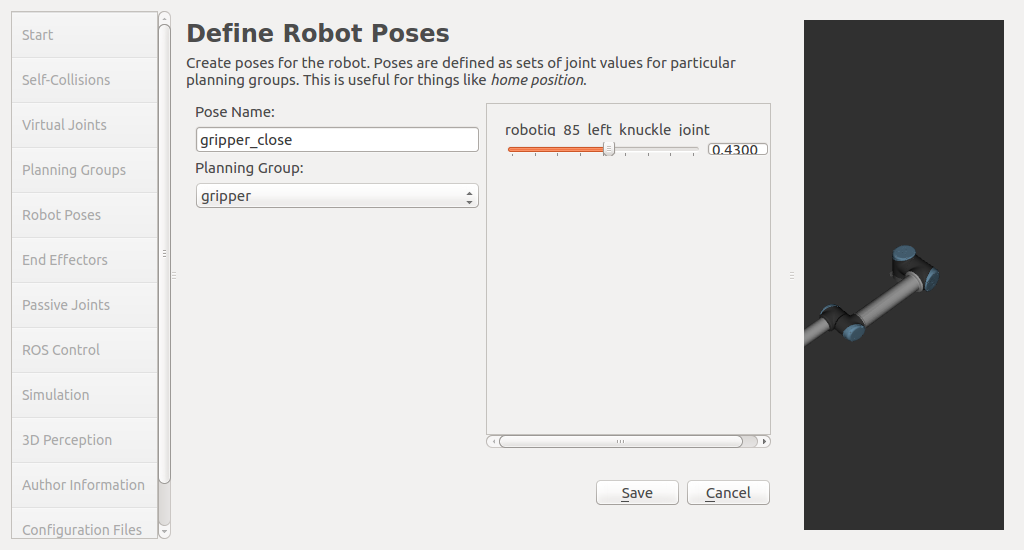
The gripper_close pose is configured on the robot poses tab:
-
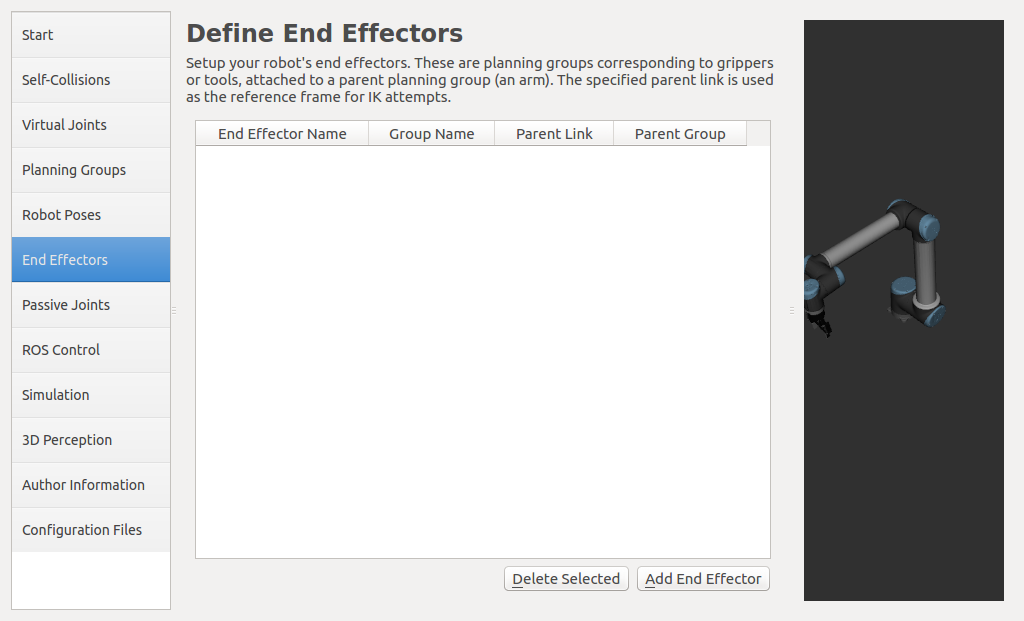
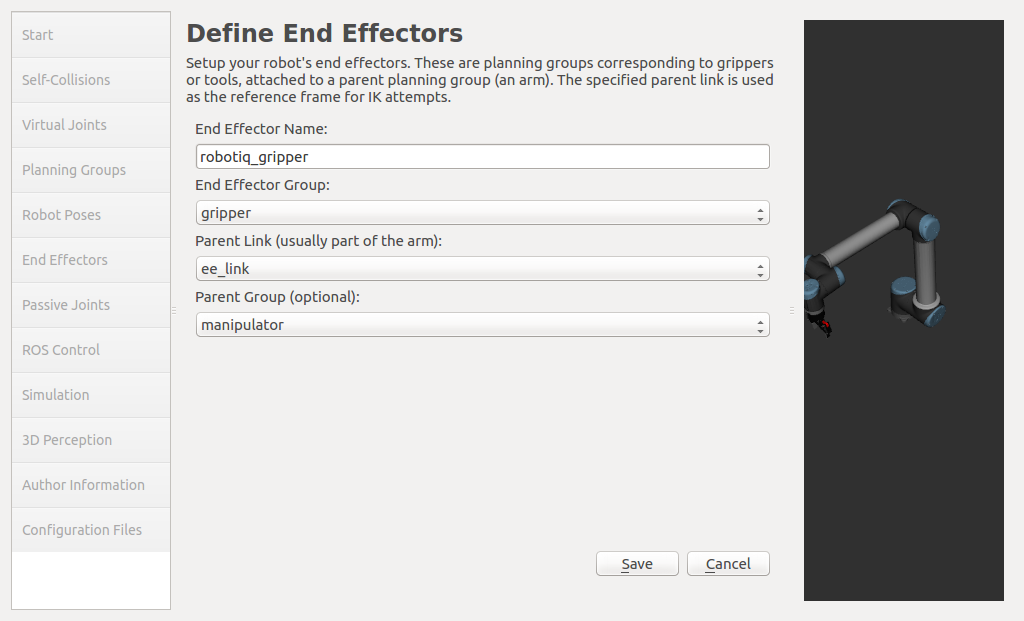
On the End Effectors tab, the gripper is added:
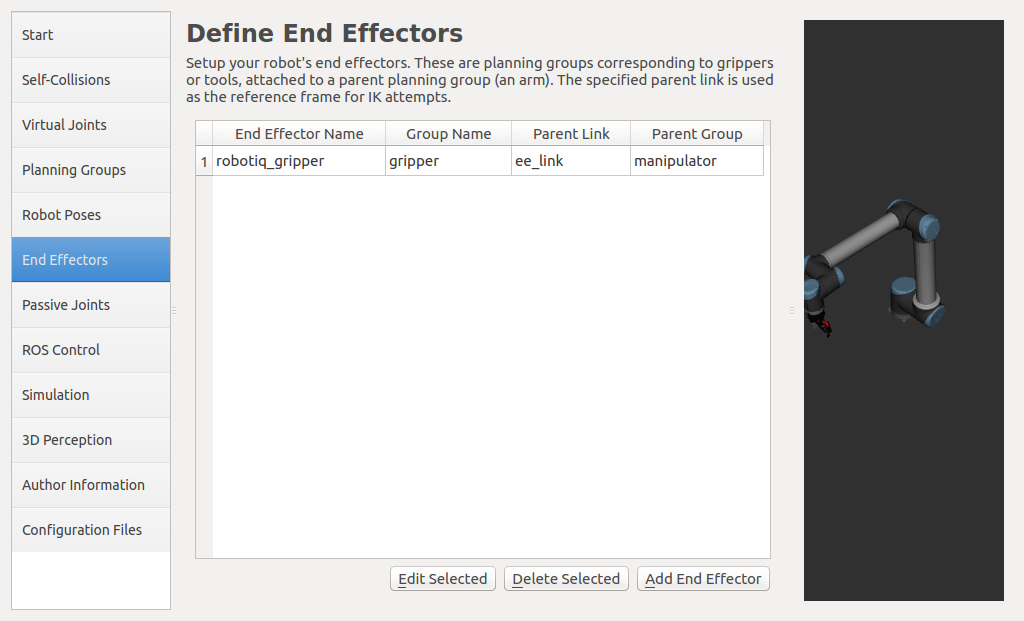
-
The Passive Joints tab contains the joints that cannot be actively moved. In the case of the gripper defined in your URDF file, these are the
jointsthat mimic the movement of another joint. Thejointsdefined as passive are not considered in the design, in which case the configuration is as follows: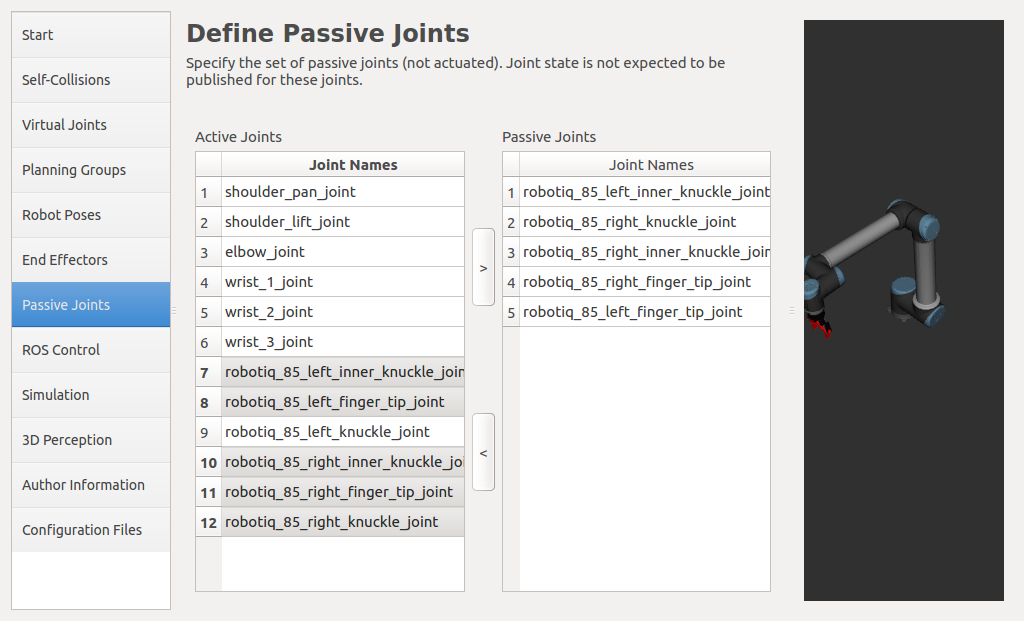 .
. -
On the ROS control tab it will be added automatically, the created files will be changed manually later.
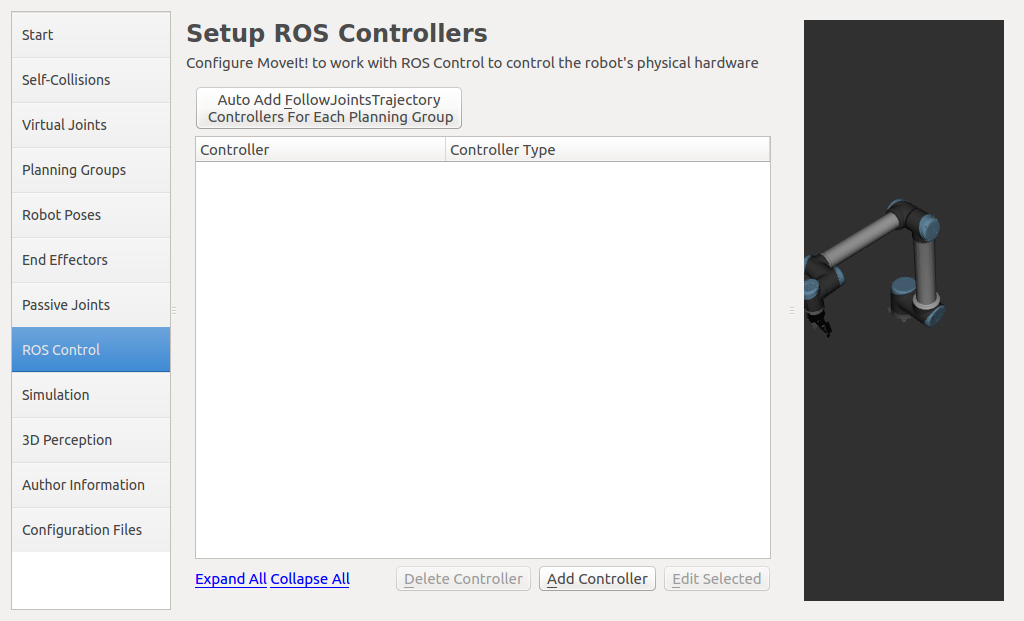
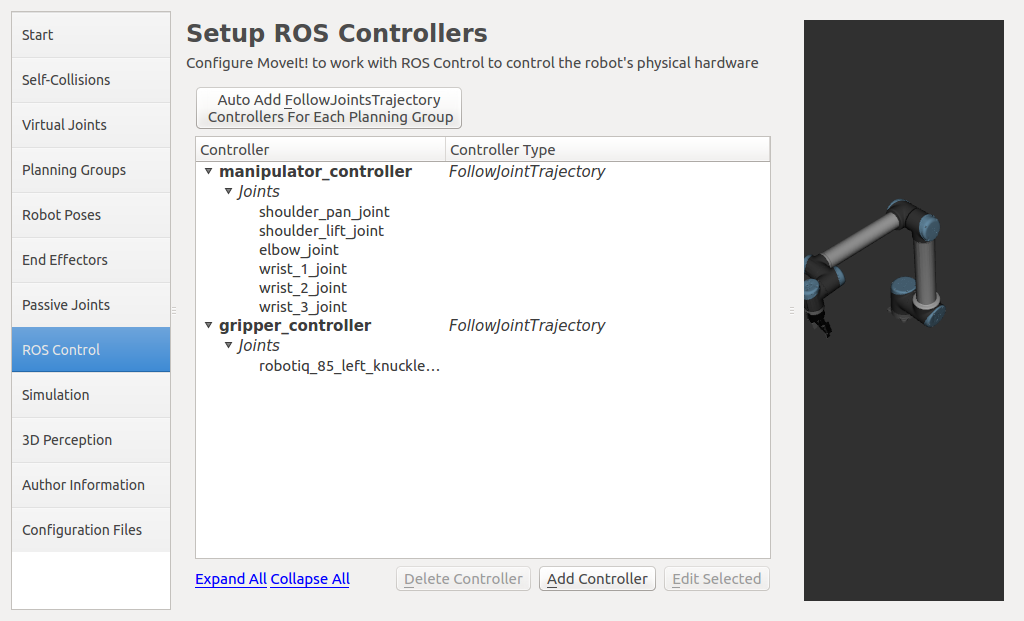
-
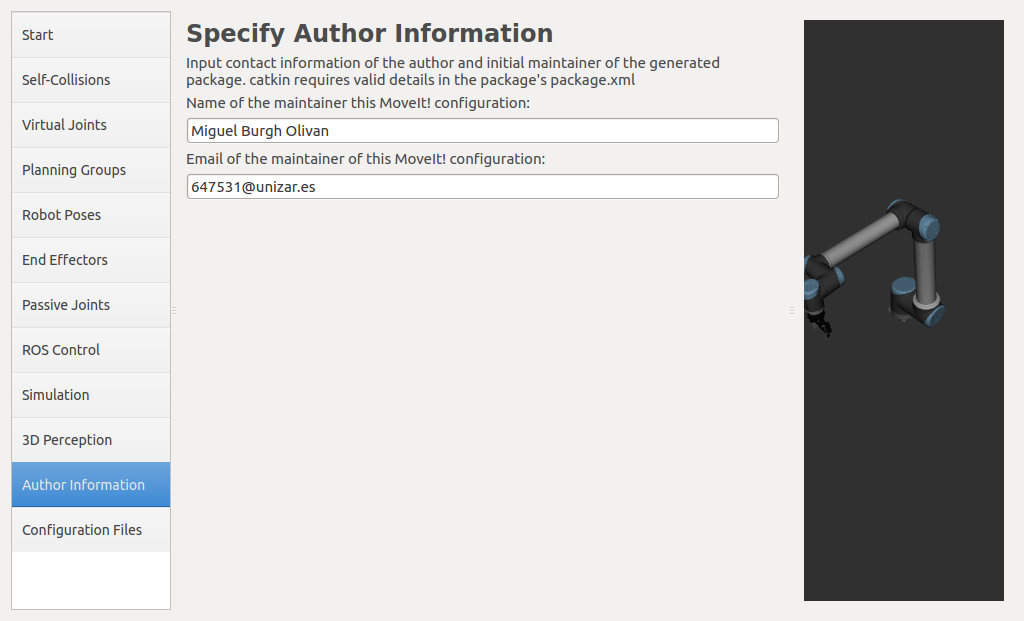
To complete the configuration, you need to fill in the Author Information tab:
 .
. -
On the last tab Configuration Files you can specify where the
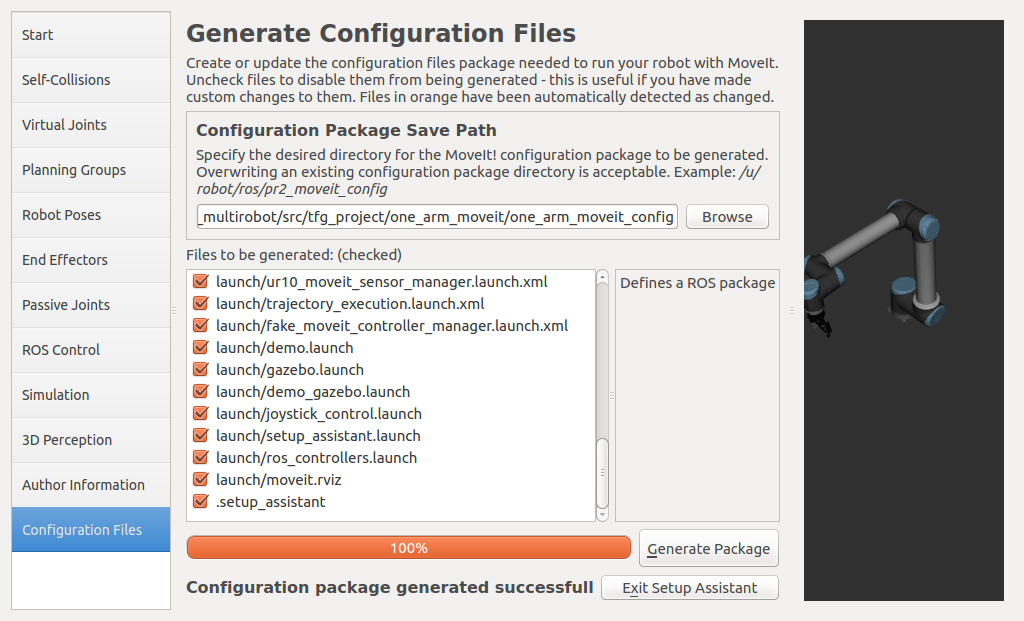
MoveIt!configuration should be stored, in this case in the previously created filefour_arm_moveit_config. The configuration is created using the Generate Package button and finally. Exit Setup Assitant to exit the programme: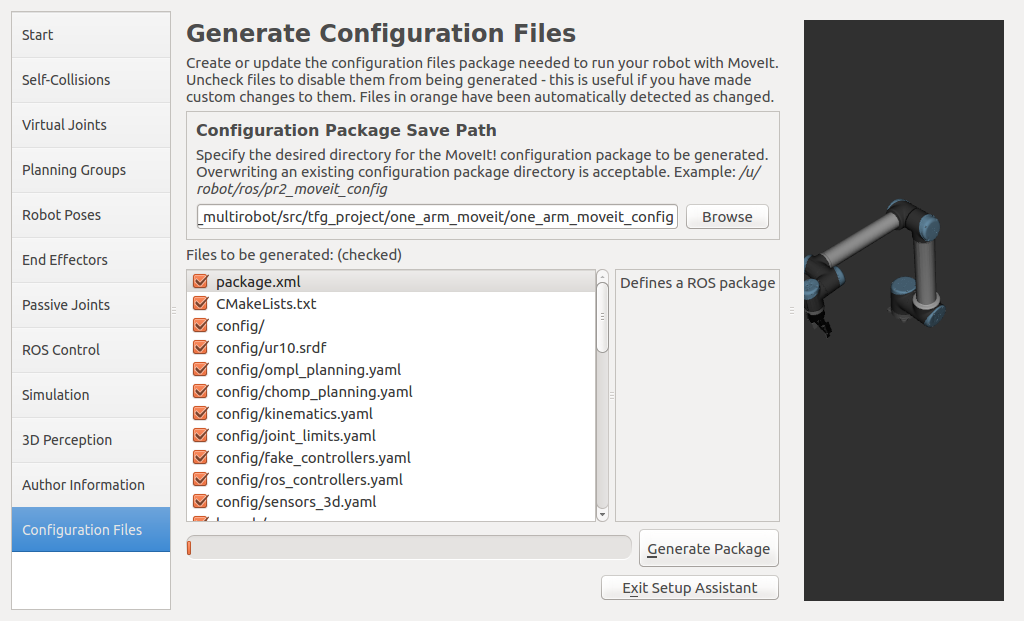
Phase 3: Simulation of a pick & place in Gazebo
This phase is divided into two stages
 Connection between
 Gazebo and MoveIt!
This stage is first about configuring Gazebo and the controllers to correctly simulate the robot’s movements. The package four_arm_moveit_gazebo is created, which contains all the configuration of Gazebo, including the controllers. Once the package is created, you need to configure the controllers, which are located in the controller directory. Although all controllers can be defined in a single file, we have spread them over three files for clarity.
The controllers are defined in files with the extension yaml. To define these controllers, you must give them a name and specify the type of controller, the dynamic joints you want to control, the constraints it has, the publishing rate, and other options.
These controllers are briefly explained below:
-
arm_controller_ur10.yaml file: This file defines the controller for the UR10 cobot. It defines the controller name
arm_controller, the controller type positioncontrollers/JointTrajectoryController, which requires the definition of the message type and the correct formatting of the information needed to communicate with the controller. Then there is thejointsfield, which specifies whichjointsof the robot are part of the controller, all of thesejointsbeing dynamic. The other fields are left untouched, but consistency must be maintained in their naming. -
File gripper_controller_robotiq.yaml: This file defines the controller for the Robotiq gripper. Here you define the controller name
gripper, the controller typeposition controllers/JointTrajectoryControllerwhich defines the type of messages and the information needed to communicate with it. Then there is thejointsfield, which specifies whichjointsof the robot are part of the controller, in this case a singlejoint_robotiq_85_left_knuckle_joint, since the otherjointsof the controller mimic the movements of this one. The other fields remain untouched, but naming consistency must be maintained as in the previous case. -
File joint_state_controller.yaml: This file is not a controller in the strict sense. Its function is that of an interface that translates the
jointinformation coming from the real cobot and converts it into messages of typeJointStatethat will be published later. It is essential for correct operation both in simulation and with the real robot. It is part of the package ROS ros_control.
 Starting
 Gazebo
We create the package for Gazebo and copy the contents of the solution from one_arm_no_moveit for later changes:
cd ~/MultiCobot-UR10-Gripper/src/multirobot/four_arm_moveit
catkin_create_pkg four_arm_moveit_gazebo rospy
In the directory created for Gazebo it copies the directory one_arm_no_moveit_gazebo, the folders controller, launch, models and world.
cd ~/MultiCobot-UR10-Gripper/src/multirobot/four_arm_moveit/four_arm_moveit_gazebo
cp -r ~/MultiCobot-UR10-Gripper/src/multirobot/one_arm_no_moveit/one_arm_no_moveit_gazebo/controller .
cp -r ~/MultiCobot-UR10-Gripper/src/multirobot/one_arm_no_moveit/one_arm_no_moveit_gazebo/launch .
cp -r ~/MultiCobot-UR10-Gripper/src/multirobot/one_arm_no_moveit/one_arm_no_moveit_gazebo/models .
cp -r ~/MultiCobot-UR10-Gripper/src/multirobot/one_arm_no_moveit/one_arm_no_moveit_gazebo/world .
 Modification of
 Gazebo files
The files are created with the following content:
-
multirobot/four_arm_moveit/four_arm_moveit_gazebo/launch/ur10_joint_limited.launch
-
multirobot/four_arm_moveit/four_arm_moveit_gazebo/launch/ur10.launch
It compiles:
cd ~/MultiCobot-UR10-Gripper
catkin_make
If you leave the configuration as it is, communication between Gazebo and MoveIt! is not possible. If you start demo.launch, it will also start Rviz, which you can use to visualize the data. As you can see it works correctly, but with the automatic configuration it is not possible to observe the operation in the Gazebo simulator.
This is because there is no communication between MoveIt! and Gazebo, so this communication is solved.
For simplicity, we will keep the start of Gazebo and MoveIt! separate for possible evaluation in the real robot.
To make it easier to get started and to better understand the MoveIt! package, we separate the contents of the packages into MoveIt! and Gazebo:
Gazebo:
- launch:
- gazebo.launch
- ros_controllers.launch
- config:
- ros_controllers.yaml
The gazebo.launch file provided by MoveIt! is not required, as the Gazebo package to be used has already been configured. The configuration is very similar if you take a look at the files involved.
MoveIt!:
- launch:
-
demo.launch
- planning_context.launch
- config:
- ur10.srdf
- joint_limits.yaml
- kinematics.yaml
- config:
-
move_group.launch
- planning_context.launch
- config:
- ur10.srdf
- joint_limits.yaml
- kinematics.yaml
- planning_pipeline.launch.xml
- ompl_planning_pipeline.launch.xml
-
trajectory_execution.launch.xml
- ur10_moveit_controller_manager.launch.xml
- config:
- ros_controllers.yaml
- sensor_manager.launch.xml
- config:
- sensors_3d.yaml
- ur10_moveit_sensor_manager.launch.xml
- config:
- moveit_rviz.launch (Rviz)
- moveit.rviz
- config:
- kinematics.yaml
- planning_context.launch
-
demo.launch
In the directory diagram you can see how the files are connected. The files that have to be changed manually are printed in bold.
The configuration file for the controllers is the same for Gazebo and MoveIt! This means that the configuration of the controllers must match the one previously created for Gazebo and configured in the Starting Gazebo section in order for the controllers to connect properly.
You can therefore add the Gazebo controllers (.yaml files) to the MoveIt! package to connect the robot controllers (manipulator and gripper) correctly.
If you start Gazebo and MoveIt! without making any changes, you will get the following representation of nodes and topics:
- Terminal 1
roslaunch four_arm_moveit_config demo.launch - Terminal 2
roslaunch four_arm_moveit_gazebo ur10_joint_limited.launch
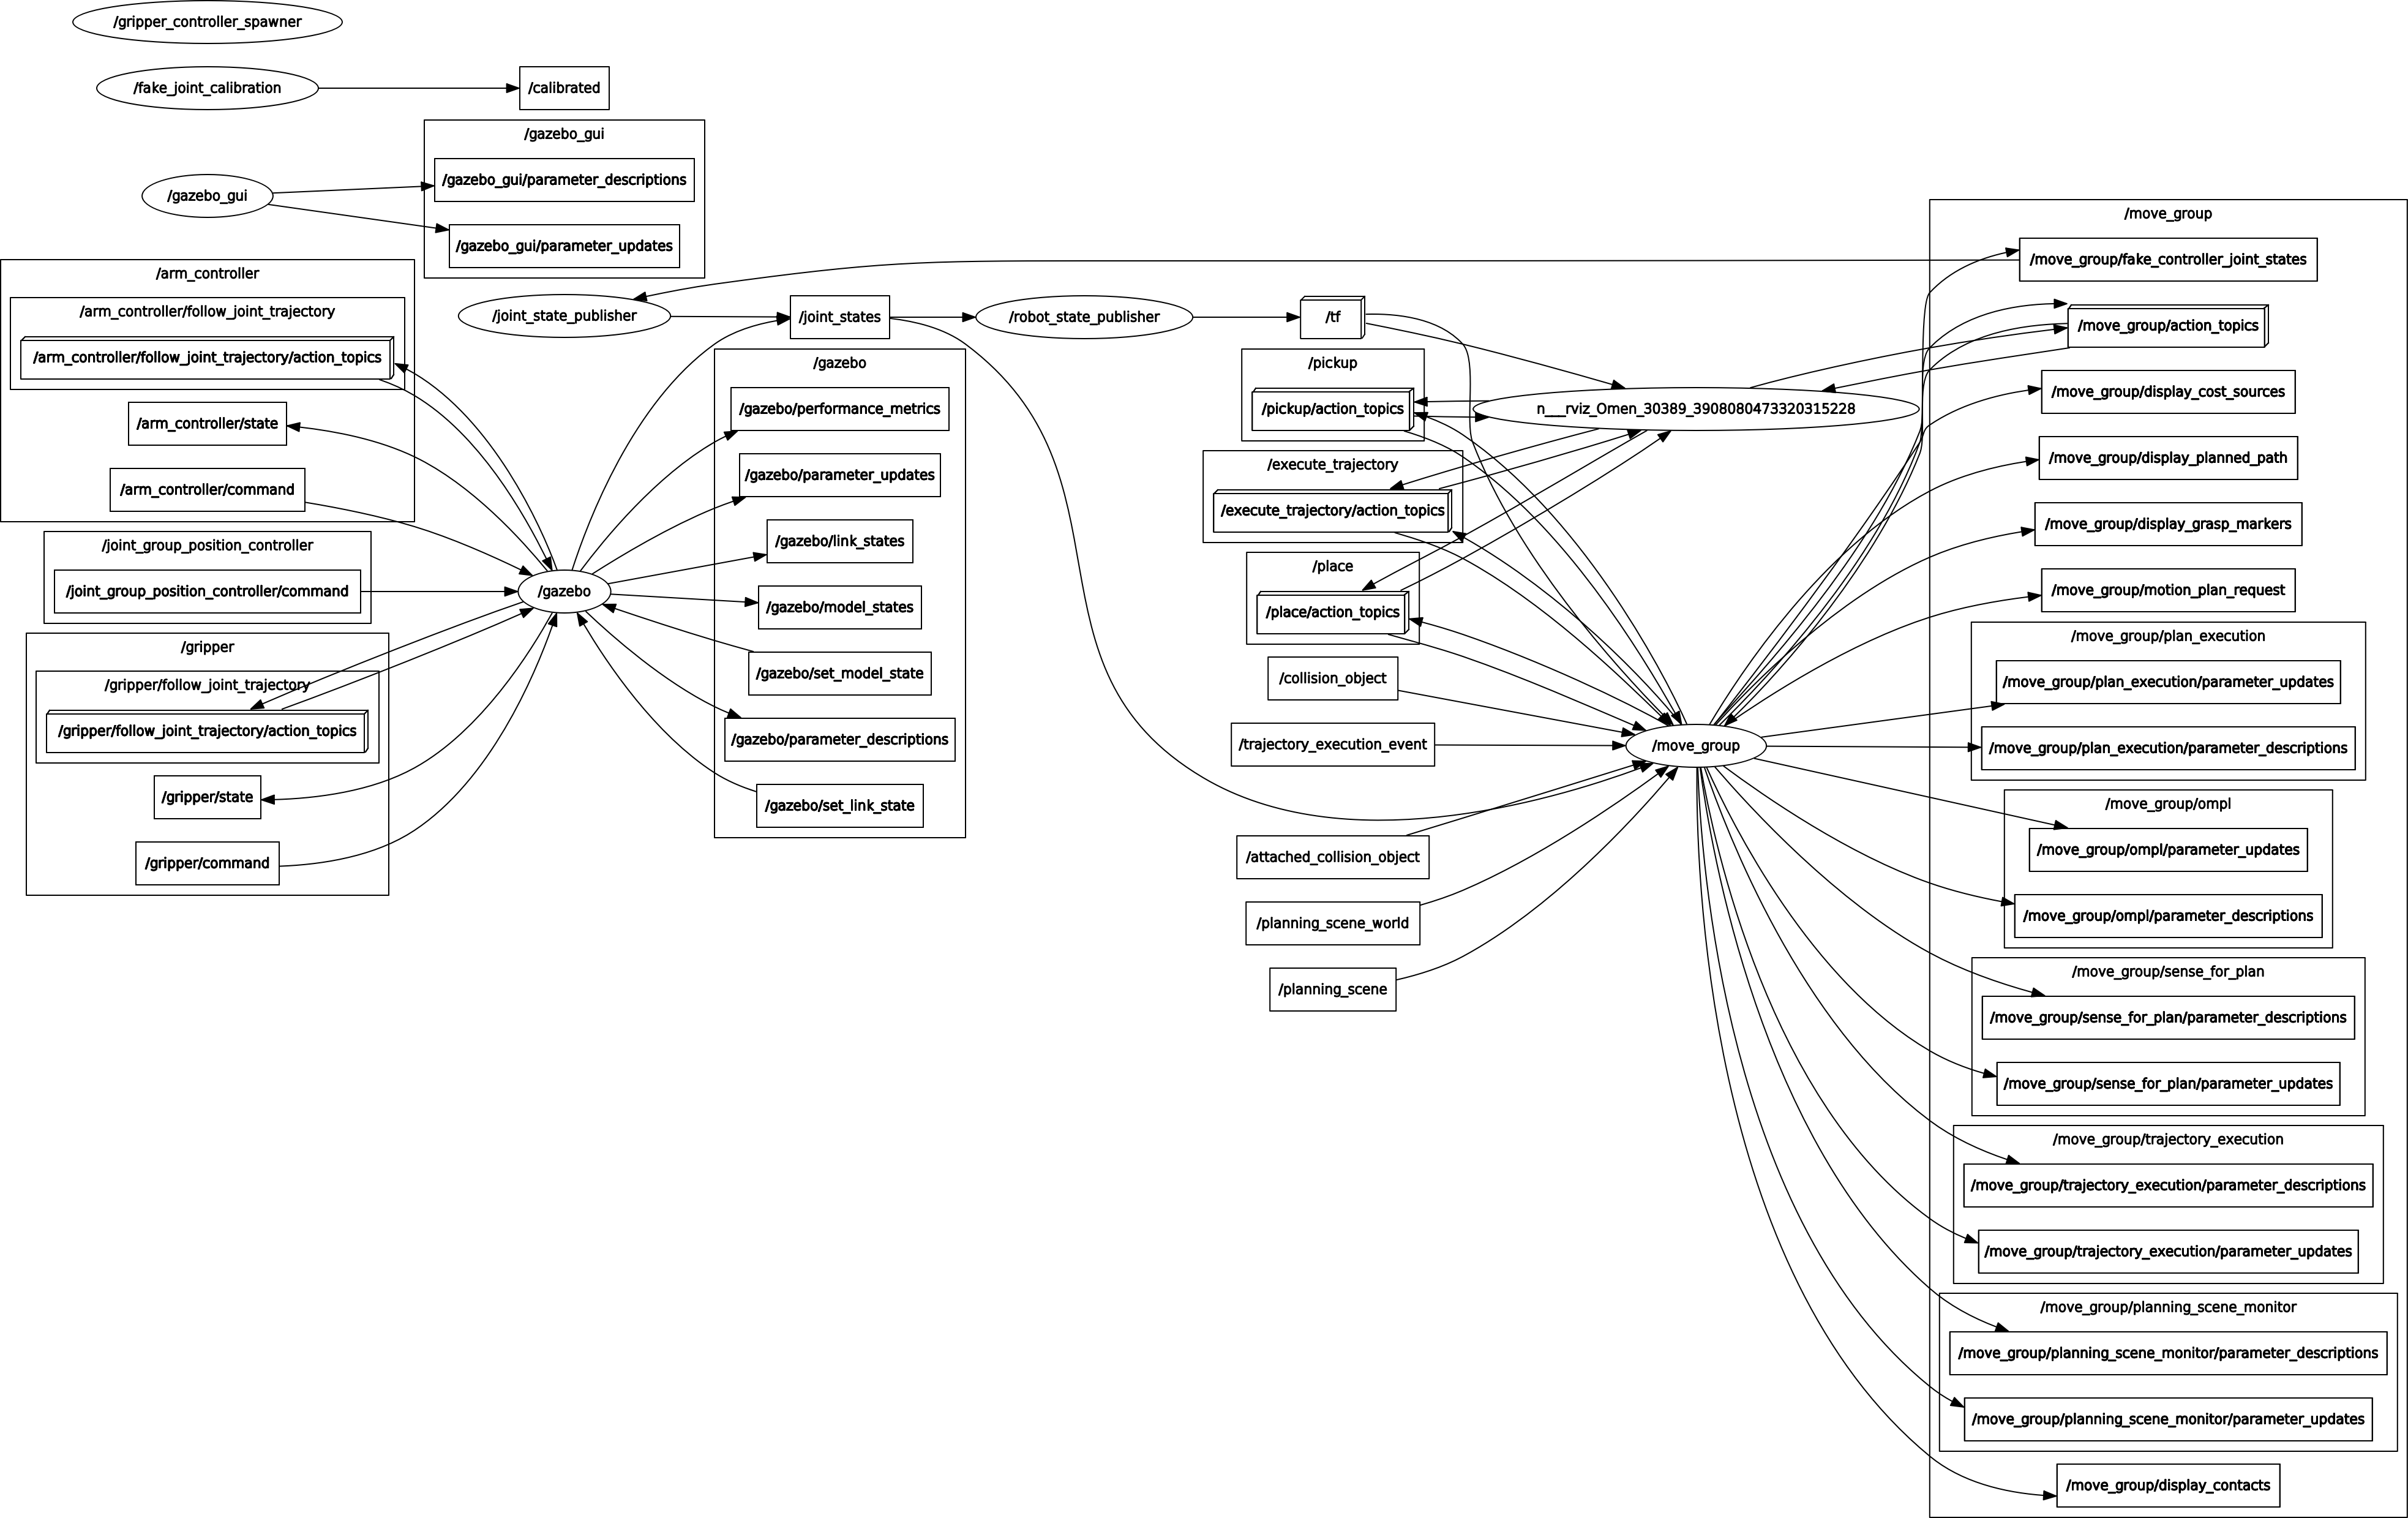
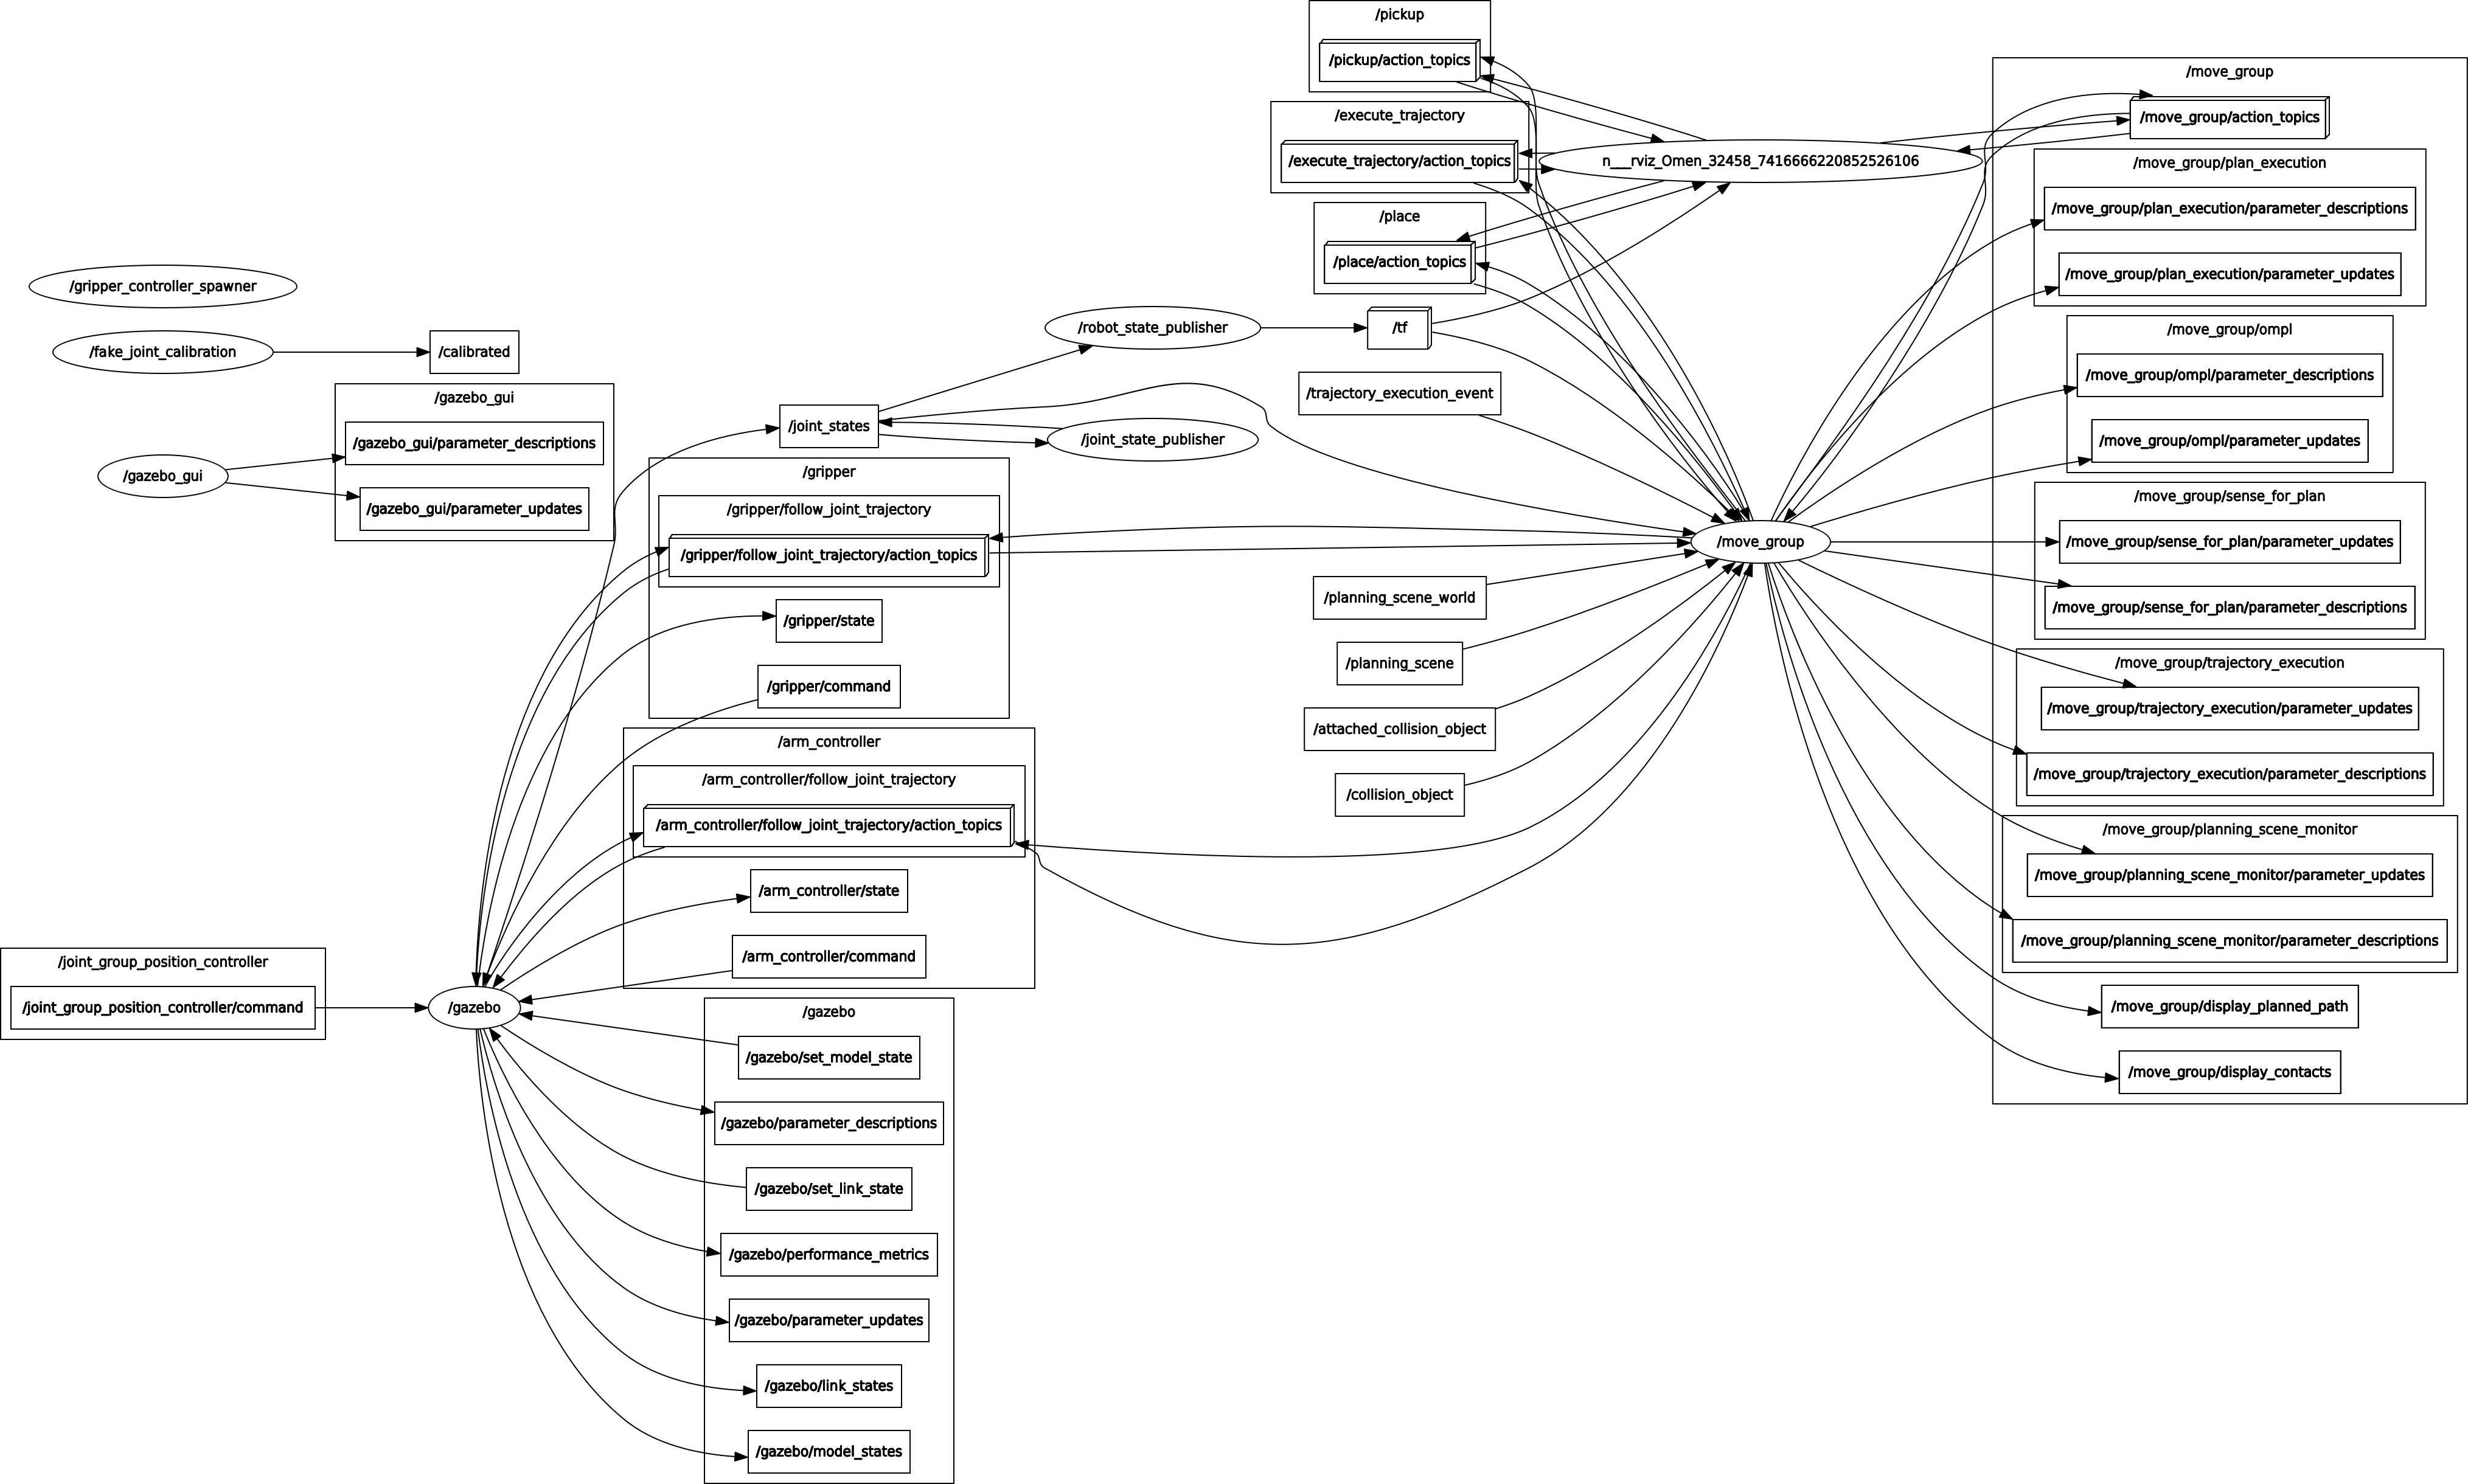
You can see that gazebo correctly loads the controllers arm_controller and gripper, but there is no communication between the node move_group and the controllers of the node gazebo, the only common point is the topic /joint_states . This means that trajectories planned and executed with the MoveIt! plugin Motion Planning will not be rendered in gazebo, but only in Rviz. Since this is not the desired result, we need to change the configuration of MoveIt! so that it can communicate with the controllers loaded in gazebo.
For this purpose the following files have to be changed. The modified files are in a different package to facilitate compression of the changes made to the configuration.
For this purpose, the following files are modified based on their original files demo.launch, move_group.launch, trajectory_execution.launch.xml and ur10_moveit_controller_manager.launch.xml and the controllers are added by creating two files controllers.yaml and joint_names.yaml:
cd ~/MultiCobot-UR10-Gripper/src/multirobot/four_arm_moveit
catkin_create_pkg four_arm_moveit_manipulator rospy
mkdir config
touch config/controllers.yaml
touch config/joint_names.yaml
mkdir launch
touch launch/four_arm_moveit_execution.launch
touch launch/move_group.launch
touch launch/trajectory_execution.launch.xml
touch launch/ur10_moveit_controller_manager.launch.xml
mkdir scripts
 Adding the controllers to interact with
 Gazebo
-
File multirobot/four_arm_moveit/four_arm_moveit_manipulator/config/controllers.yaml: The definition of the ROS controllers in
MoveIt!is similar to that forGazebo, the name of the controllers must match the names of the controllers described inGazebo, the action serverfollow_joint_trajectoryis defined, the type must beFollowJointTrajectoryso that the message types sent between them are compatible and finally the names of thejoinsinvolved must be identical. -
Another file to modify is multirobot/four_arm_moveit/four_arm_moveit_manipulator/config/joint_names.yaml: This file defines the name of the
jointsof the cobot controller. It is saved as a server parameter and used as part of theMoveIt!configuration.
From the files in the launch directory we will modify the four_arm_moveit_execution file, which is the entry point for using the MoveIt! package and Rviz, which is based on the demo.launch file:
- File multirobot/four_arm_moveit/four_arm_moveit_manipulator/launch/four_arm_moveit_execution.launch.
Then optimise the controller launcher and MoveIt!:
-
File multirobot/four_arm_moveit/four_arm_moveit_manipulator/launch/move_group.launch.
-
File multirobot/four_arm_moveit/four_arm_moveit_manipulator/launch/trajectory_execution.launch.xml: set up communication with a real robot. In this case,
Gazebois the one simulating the robot, butMoveIt!is not aware of it and treats it like a real robot. -
File multirobot/four_arm_moveit/four_arm_moveit_manipulator/launch/ur10_moveit_controller_manager.launch.xml: Loading controllers designed for
MoveIt!.
 Finally, a test is performed:
cd ~/MultiCobot-UR10-Gripper
catkin_make
- Terminal 1
roslaunch four_arm_moveit_gazebo ur10_joint_limited.launch - Terminal 2
roslaunch four_arm_moveit_manipulator four_arm_moveit_execution.launch
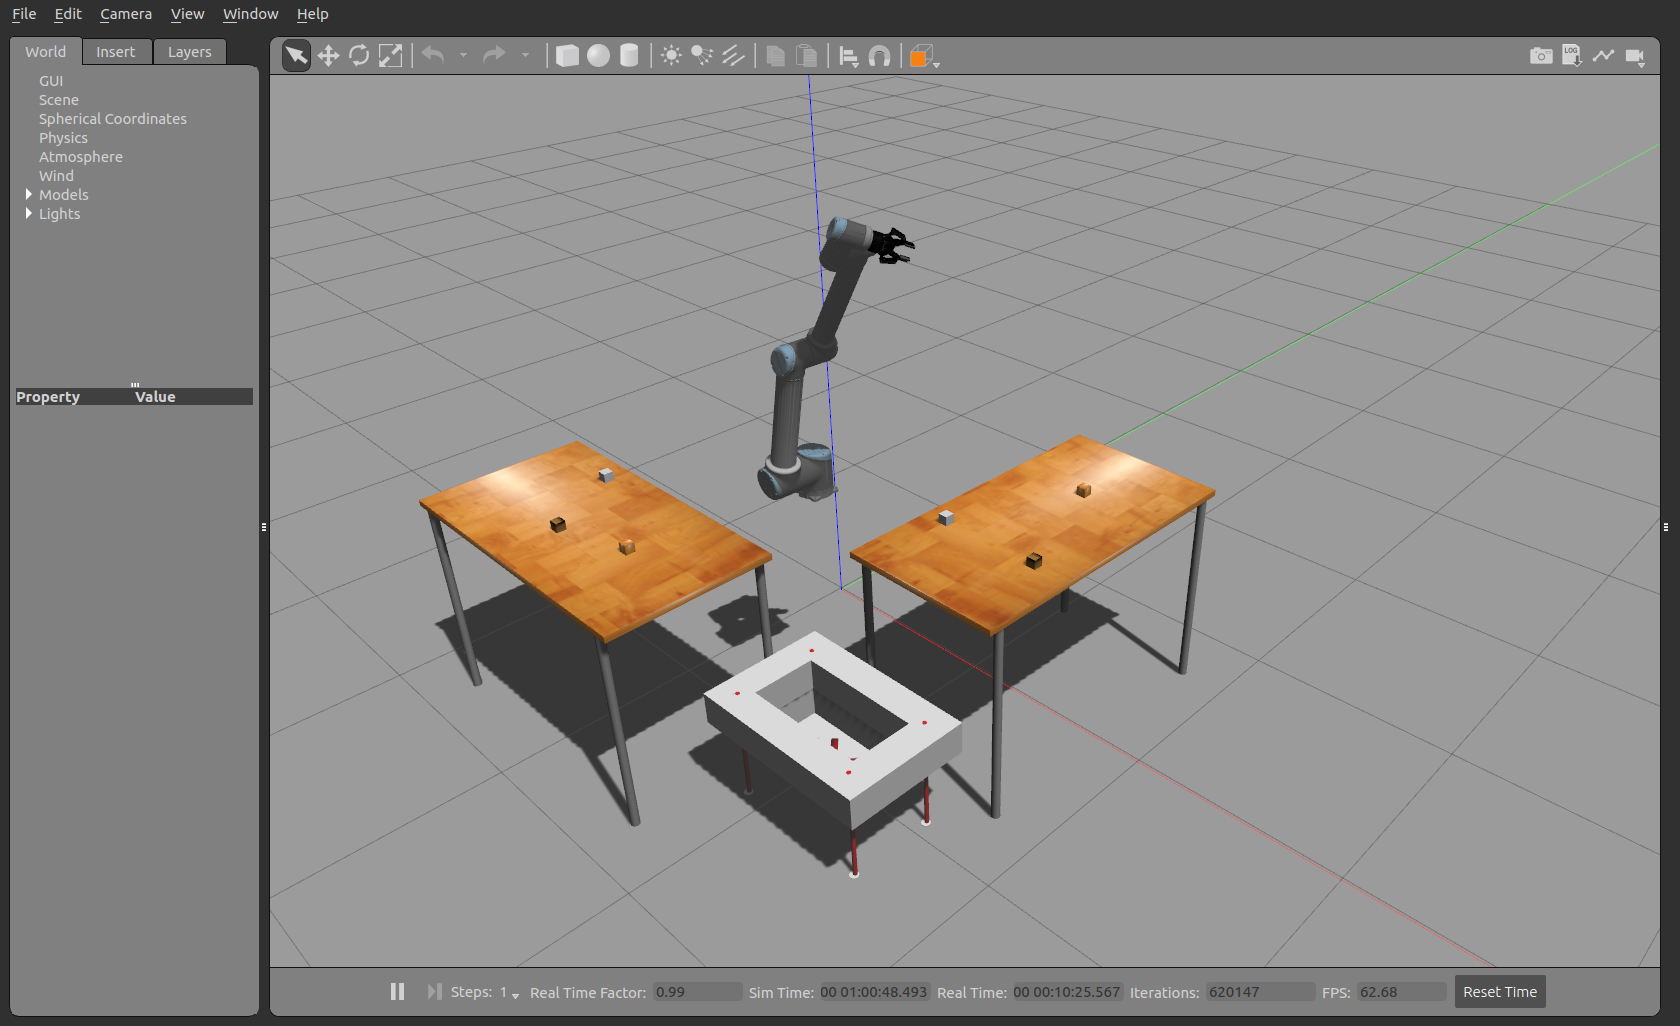
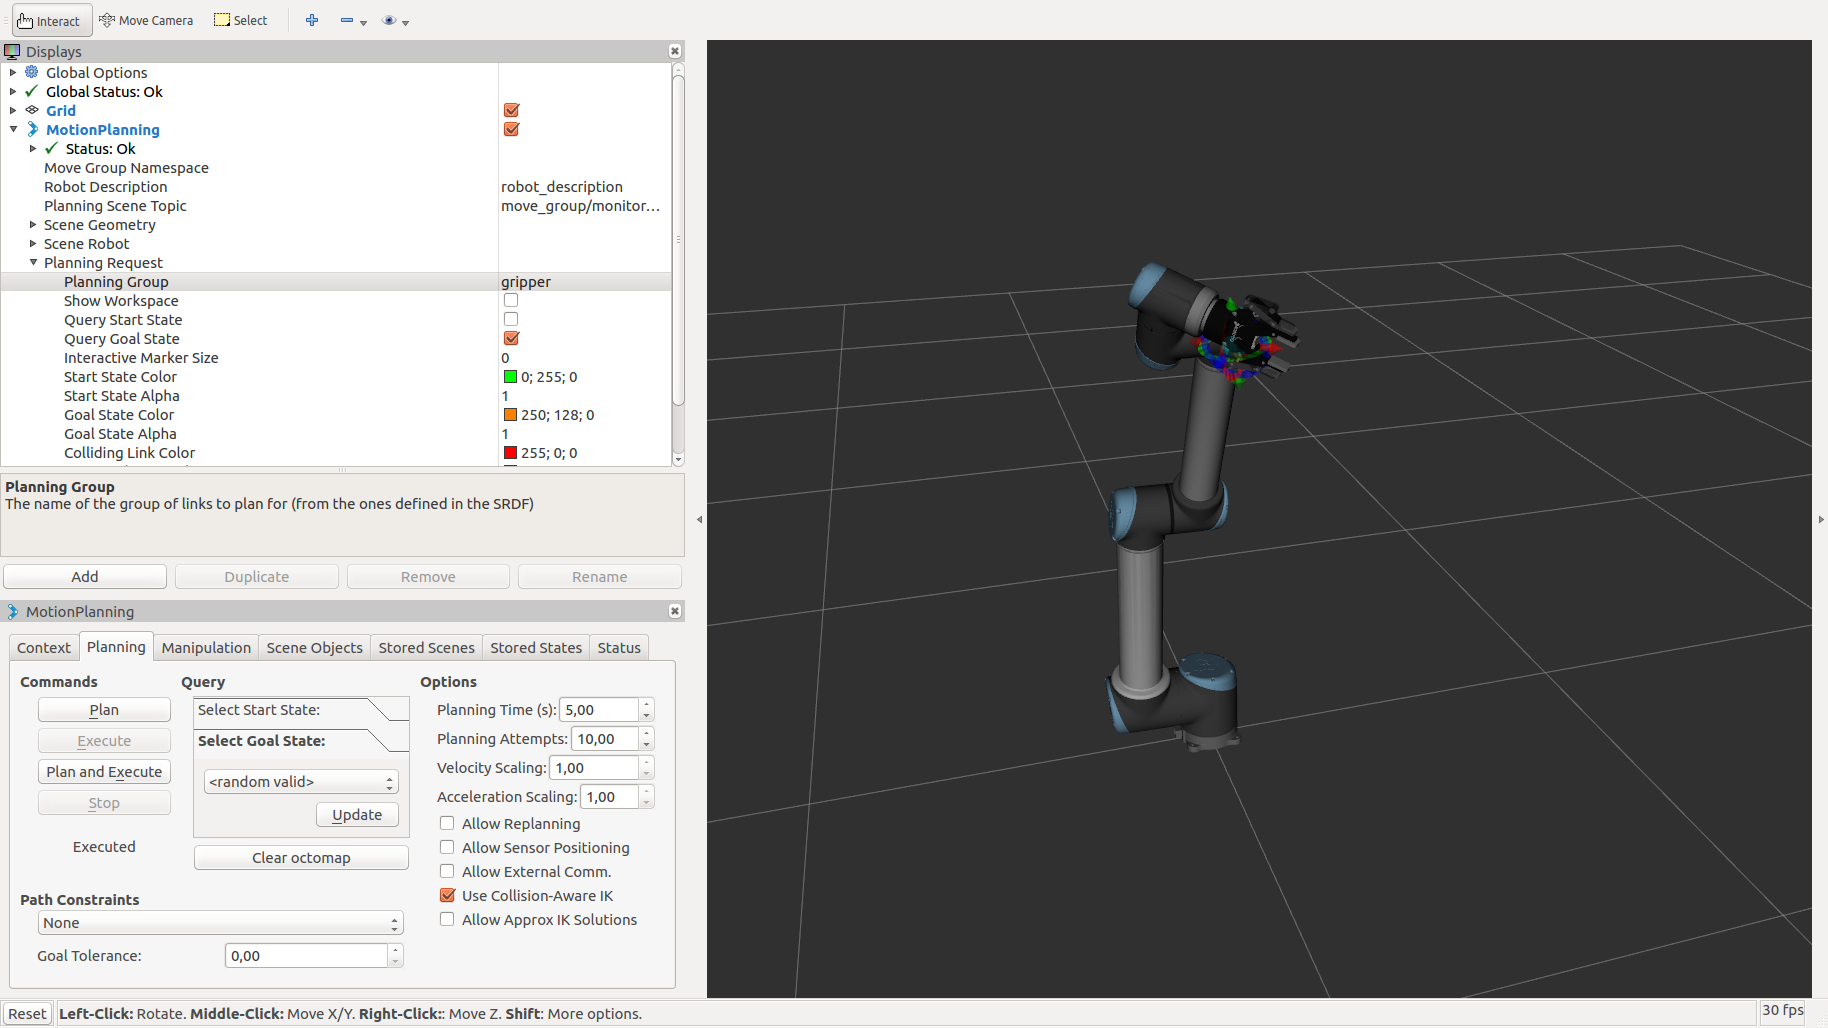
And the graph of nodes and topics, after the changes, you can see how now the node move_group communicates with the controllers and it is Gazebo that listens to what is published to perform the desired movements. These movements change the current state of the robot, which is published in the topic /jont_states, and this information is passed to the robot_state_publisher node and the move_group node. The move_group node can recalculate a new path with the information it receives from the topics /tf and /jont_states.
 Pick and Place
To script pick & place in Python, the Python interface moveit_commander is used to communicate with the node move_group and its services and actions. Since it is not very problematic for controlling a single robot and there is good documentation, the script is described in detail for the solution with two or more cobots.
Very simple tests are performed. To do this, you must first create the necessary scripts to correctly control the robot arm and gripper. Then the movements are performed so that the robot picks up a cube from the table and puts it into the basket.
cd scripts
touch four_arm_moveit.py
File multirobot/four_arm_moveit/four_arm_moveit_manipulator/scripts/four_arm_moveit.py
Execution of the tests
- Terminal 1
roslaunch four_arm_moveit_gazebo ur10_joint_limited.launch - Terminal 2
roslaunch four_arm_moveit_manipulator four_arm_moveit_execution.launch - Terminal 3
rosrun four_arm_moveit_manipulator four_arm_moveit.py
Modifications: Multirobot system composed of four robots
To be able to control two or more cobots at the same time and with different controllers, which means that they can be cobots of different brands and models, the MoveIt! node and the simulated robot are replicated in Gazebo.
If you want to do a proper replication, you need to apply the concept of namespace, which can be seen like a directory containing nodes, topics or even other directories (namespaces) that also allow nested organization and ROS allows to run instances of the same node as long as they are in different namespaces. Building on what has been done so far, changes are made to the four_arm_moveit_gazebo and four_arm_moveit_manipulator packages, which include the changes to the MoveIt! package (four_arm_moveit_config) previously configured by the Setup Assitant.
The configuration process is divided into two parts: the configuration in Gazebo for two cobots and the configuration in MoveIt!
Configuration in Gazebo for four cobots
In order to have four cobots in the simulation, it will be explained what changes must be made in the launch files to allow the addition of more cobots in the simulation correctly.
The idea is to create an external file that replicates (launches instances) of as many cobots as you want to add to the simulation. Therefore, the Gazebo files from the four_arm_moveit_gazebo package are prepared first.
-
File ur10_joint_limited.launch: Two arguments have been added to the original file, the robot name (
robot_name) and the initial pose (init_pose). These two arguments are taken from the file that contains this launch. -
File ur10.launch: Similar to the launch file above (
ur10_joint_limited.launch), two arguments have been added to this file, namely the robot name (robot_name) and the initial pose (init_pose), which are defined in the file that contains it. Apart from the addition of the arguments, the instantiation of the virtual worldGazeboand the loading of the robot model into the parameter server (robot_description) have been removed. -
File [controller_utils.launch]https://github.com/Serru/MultiCobot-UR10-Gripper/blob/main/src/multirobot/four_arm_moveit/four_arm_moveit_gazebo/launch/controller_utils.launch): In this file you only need to comment out the
tf_prefixparameter. Its default value is an empty string, but this interferes when changing the default value.
It compiles:
cd ~/MultiCobot-UR10-Gripper
catkin_make
 Replication of Cobots in
 Gazebo
Once the files of the Gazebo package four_arm_moveit_gazebo are configured, multiple cobots are instantiated in it. This is done by creating a launch file named four_arm_moveit_gazebo inside the four_arm_moveit_manipulator package (it can be any other package). The launch file contains the following:
<launch>
    <param name="/use_sim_time" value="true"/>
    <arg name="robot_name"/>
    <arg name="init_pose"/>
    <arg name="paused" default="false"/>
    <arg name="gui" default="true"/>
    <arg name="limited" default="true"  doc="If true, limits joint range [-PI, PI] on all joints." />

    <!-- send robot urdf to param server -->
    <include file="$(find four_arm_moveit_description)/launch/ur10_upload.launch">
      <arg name="limited" value="$(arg limited)"/>
    </include>

    <include file="$(find gazebo_ros)/launch/empty_world.launch">
        <!--arg name="world_name" default="worlds/empty.world"/-->
        <arg name="verbose" value="true"/>
        <arg name="world_name" default="$(find four_arm_moveit_gazebo)/world/multiarm_bot.world"/>
        <arg name="paused" value="$(arg paused)"/>
        <!--arg name="gui" value="$(arg gui)"/-->
        <arg name="gui" value="$(arg gui)"/>
    </include>

    <group ns="ur10_1">
        <param name="tf_prefix" value="ur10_1_tf" />
        <include file="$(find four_arm_moveit_gazebo)/launch/ur10_joint_limited.launch">
            <arg name="init_pose" value="-x 0.6 -y -0.6 -z 1.1"/>
            <arg name="robot_name" value="ur10_1"/>
        </include>
    </group>

    <group ns="ur10_2">
        <param name="tf_prefix" value="ur10_2_tf" />
        <include file="$(find four_arm_moveit_gazebo)/launch/ur10_joint_limited.launch">
            <arg name="robot_name" value="ur10_2"/>
            <arg name="init_pose" value="-x 0.6 -y 1.38 -z 1.1"/>
        </include>
    </group>

    <group ns="ur10_3">
        <param name="tf_prefix" value="ur10_3_tf" />
        <include file="$(find four_arm_moveit_gazebo)/launch/ur10_joint_limited.launch">
            <arg name="robot_name" value="ur10_3"/>
            <arg name="init_pose" value="-x 0.6 -y 3.36 -z 1.1"/>
        </include>
    </group>

    <group ns="ur10_4">
        <param name="tf_prefix" value="ur10_4_tf" />
        <include file="$(find four_arm_moveit_gazebo)/launch/ur10_joint_limited.launch">
            <arg name="robot_name" value="ur10_4"/>
            <arg name="init_pose" value="-x 0.6 -y 5.34 -z 1.1"/>
        </include>
    </group>

    <node pkg="tf" type="static_transform_publisher" name="world_frames_connection_1" args="0 0 0 0 0 0 /world /ur10_1_tf/world 100"/>

    <node pkg="tf" type="static_transform_publisher" name="world_frames_connection_2" args="0 0 0 0 0 0 /world /ur10_2_tf/world 100"/>

    <node pkg="tf" type="static_transform_publisher" name="world_frames_connection_3" args="0 0 0 0 0 0 /world /ur10_3_tf/world 100"/>

    <node pkg="tf" type="static_transform_publisher" name="world_frames_connection_4" args="0 0 0 0 0 0 /world /ur10_4_tf/world 100"/>

</launch>
The first thing you see in the content of the file (four_arm_moveit_gazebo.launch) is that it loads the robot model into the parameter server and instantiates the virtual world of Gazebo, which was removed from the file ur10.launch, this needs to be here because you only want to instantiate the Gazebo world once.
Then four groups appear, ur10_1, ur10_2, ur10_3 and ur10_4, this is the way to define the namespaces, the configuration of these cobots is identical except for three things, the value of the parameter tf_prefix which will be the prefix that will go in the transforms, it is important that it matches the name of the group (namespace), the name (robot_name) and its initial position (init_pose).
If you want to add more cobots to the system, simply copy the content of group and modify the content accordingly. And note the last four lines of code bind the cobot base to the world frame.
Configuration in MoveIt! for four cobots
The changes to the MoveIt! configuration are very minor, basically you need to group the code implemented for a single cobot under a namespace, adjust the remap with the namespace, and then repeat the process as many times as cobots are simulated. Comparing the contents of the one_arm_moveit_execution.launch file implemented for a single cobot to the contents of the four_arm_moveit_execution.launch file, essentially everything has been grouped into a namespace and the name of the namespace has been added as a prefix in the names of the topics of the remap for proper communication with the controllers.
Contents of the file four_arm_moveit_execution.launch:
<launch>
    <arg name="sim" default="false" />
    <arg name="debug" default="false" />
    <!-- By default, we do not start a database (it can be large) -->
    <arg name="demo" default="false" />

    <group ns="ur10_1">
      <rosparam command="load" file="$(find four_arm_moveit_manipulator)/config/joint_names.yaml"/>

      <include file="$(find four_arm_moveit_config)/launch/planning_context.launch">
        <arg name="load_robot_description" value="true"/>
      </include>

      <!-- We do not have a robot connected, so publish fake joint states -->
      <node name="joint_state_publisher" pkg="joint_state_publisher" type="joint_state_publisher">
        <param name="/use_gui" value="false"/>
        <rosparam param="/source_list">[/joint_states]</rosparam>
      </node>

      <include file="$(find four_arm_moveit_manipulator)/launch/move_group.launch">
        <arg name="debug" default="$(arg debug)" />
        <arg name="publish_monitored_planning_scene" value="true"/>
        <!--arg name="info" value="true"/-->
      </include>

      <!-- If database loading was enabled, start mongodb as well -->
      <include file="$(find four_arm_moveit_config)/launch/default_warehouse_db.launch" if="$(arg demo)"/>

      <!-- Remap follow_joint_trajectory -->
      <remap from="/ur10_1/follow_joint_trajectory" to="/ur10_1/arm_controller/follow_joint_trajectory"/>

      <include file="$(find four_arm_moveit_config)/launch/moveit_rviz.launch">
        <arg name="config" value="true"/>
        <arg name="debug" default="false"/>
      </include>
    </group>

    <group ns="ur10_2">
      <rosparam command="load" file="$(find four_arm_moveit_manipulator)/config/joint_names.yaml"/>

      <include file="$(find four_arm_moveit_config)/launch/planning_context.launch">
        <arg name="load_robot_description" value="true"/>
      </include>

      <!-- We do not have a robot connected, so publish fake joint states -->
      <node name="joint_state_publisher" pkg="joint_state_publisher" type="joint_state_publisher">
        <param name="/use_gui" value="false"/>
        <rosparam param="/source_list">[/joint_states]</rosparam>
      </node>

      <include file="$(find four_arm_moveit_manipulator)/launch/move_group.launch">
        <arg name="debug" default="$(arg debug)" />
        <arg name="publish_monitored_planning_scene" value="true"/>
        <!--arg name="info" value="true"/-->
      </include>

      <!-- If database loading was enabled, start mongodb as well -->
      <include file="$(find four_arm_moveit_config)/launch/default_warehouse_db.launch" if="$(arg demo)"/>

      <!-- Remap follow_joint_trajectory -->
      <remap from="/ur10_2/follow_joint_trajectory" to="/ur10_2/arm_controller/follow_joint_trajectory"/>

      <include file="$(find four_arm_moveit_config)/launch/moveit_rviz.launch">
        <arg name="config" value="true"/>
        <arg name="debug" default="false"/>
      </include>
    </group>

    <group ns="ur10_3">
      <rosparam command="load" file="$(find four_arm_moveit_manipulator)/config/joint_names.yaml"/>

      <include file="$(find four_arm_moveit_config)/launch/planning_context.launch">
        <arg name="load_robot_description" value="true"/>
      </include>

      <!-- We do not have a robot connected, so publish fake joint states -->
      <node name="joint_state_publisher" pkg="joint_state_publisher" type="joint_state_publisher">
        <param name="/use_gui" value="false"/>
        <rosparam param="/source_list">[/joint_states]</rosparam>
      </node>

      <include file="$(find four_arm_moveit_manipulator)/launch/move_group.launch">
        <arg name="debug" default="$(arg debug)" />
        <arg name="publish_monitored_planning_scene" value="true"/>
        <!--arg name="info" value="true"/-->
      </include>

      <!-- If database loading was enabled, start mongodb as well -->
      <include file="$(find four_arm_moveit_config)/launch/default_warehouse_db.launch" if="$(arg demo)"/>

      <!-- Remap follow_joint_trajectory -->
      <remap from="/ur10_3/follow_joint_trajectory" to="/ur10_3/arm_controller/follow_joint_trajectory"/>

      <include file="$(find four_arm_moveit_config)/launch/moveit_rviz.launch">
        <arg name="config" value="true"/>
        <arg name="debug" default="false"/>
      </include>
    </group>

    <group ns="ur10_4">
      <rosparam command="load" file="$(find four_arm_moveit_manipulator)/config/joint_names.yaml"/>

      <include file="$(find four_arm_moveit_config)/launch/planning_context.launch">
        <arg name="load_robot_description" value="true"/>
      </include>

      <!-- We do not have a robot connected, so publish fake joint states -->
      <node name="joint_state_publisher" pkg="joint_state_publisher" type="joint_state_publisher">
        <param name="/use_gui" value="false"/>
        <rosparam param="/source_list">[/joint_states]</rosparam>
      </node>

      <include file="$(find four_arm_moveit_manipulator)/launch/move_group.launch">
        <arg name="debug" default="$(arg debug)" />
        <arg name="publish_monitored_planning_scene" value="true"/>
        <!--arg name="info" value="true"/-->
      </include>

      <!-- If database loading was enabled, start mongodb as well -->
      <include file="$(find four_arm_moveit_config)/launch/default_warehouse_db.launch" if="$(arg demo)"/>

      <!-- Remap follow_joint_trajectory -->
      <remap from="/ur10_4/follow_joint_trajectory" to="/ur10_4/arm_controller/follow_joint_trajectory"/>

      <include file="$(find four_arm_moveit_config)/launch/moveit_rviz.launch">
        <arg name="config" value="true"/>
        <arg name="debug" default="false"/>
      </include>
    </group>
</launch>
A test of what has been implemented so far is carried out:
cd ~/MultiCobot-UR10-Gripper
catkin_make clean
catkin_make
rospack profile
- Terminal 1
roslaunch four_arm_moveit_manipulator four_arm_moveit_gazebo.launch - Terminal 2
roslaunch four_arm_moveit_manipulator four_arm_moveit_execution.launch
 Pick & Place
As with the previous solutions, a very simple test is performed. To do this, you must first create the necessary scripts to correctly control the robot arms and grippers. Then, the same movements as in the previously proposed solutions will be executed.
The following piece of code corresponds to the configuration to be able to communicate with the API of the node move_group when it is in a namespace:
[...]

1 def main():
2     moveit_commander.roscpp_initializer.roscpp_initialize(sys.argv)
3     rospy.init_node('ur10_1_arm_moveit',
4                   anonymous=True)
5
6     PLANNING_GROUP_GRIPPER = "gripper"
7     PLANNING_GROUP_ARM = "manipulator"
8     PLANNING_NS = "/ur10_1/"
9     REFERENCE_FRAME = "/ur10_1/world"
10
11     ## Instantiate a RobotCommander object.  This object is an interface to
12     ## the robot as a whole.
13     robot = moveit_commander.RobotCommander(
14       "%srobot_description"%PLANNING_NS,
15       ns="/ur10_1/"
16     )
17
18     arm = moveit_commander.move_group.MoveGroupCommander(
19       PLANNING_GROUP_ARM,
20       "%srobot_description"%PLANNING_NS,
21       ns="/ur10_1/"
22     )
23
24     gripper = moveit_commander.move_group.MoveGroupCommander(
25       PLANNING_GROUP_GRIPPER,
26       "%srobot_description"%PLANNING_NS,
27       ns="/ur10_1/"
28    )
29
30     ## We create this DisplayTrajectory publisher which is used below to publish
31     ## trajectories for RVIZ to visualize.
32     display_trajectory_publisher = rospy.Publisher(
33       '/move_group/display_planned_path',
34       moveit_msgs.msg.DisplayTrajectory,
35    queue_size=10
36     )
37
38     rospy.sleep(2)
39
40     arm.set_num_planning_attempts(15)
41     arm.set_planning_time(5)
42     arm.allow_looking(True)
43     arm.allow_replanning(True)
44     arm.set_pose_reference_frame(REFERENCE_FRAME)
45     arm.set_goal_position_tolerance(0.001)
46     arm.set_goal_orientation_tolerance(0.001)
47
48     gripper.set_num_planning_attempts(15)
49     gripper.allow_replanning(True)
50     gripper.allow_looking(True)
51
52     pick_place(arm, gripper)
53
54     ## When finished shut down moveit_commander.
55     moveit_commander.roscpp_shutdown()
The configuration was defined in the function main, but it is not necessary to have it here. It is better to modulate it and pass the configuration via parameters, but it is sufficient for this explanation.
-
Line 2: The first thing you need to do is initialize
moveit_commander. This is an API for the interface developed inC++, which is defined as a wrapper and provides most of the functionality of the interface of theC++version, but not all of the functionality ofMoveIt!It is necessary because, among other things, it allows the calculation of Cartesian trajectories, which is the functionality that is mainly needed. -
Line 3: Initialize the node named
ur10_1_armmoveit. -
Lines 6-9: The constants are defined to facilitate configuration. The first two lines (6 and 7) define the names given to the planning groups, in this case they were named
gripperfor the gripper andmanipulatorfor the UR10 cobot arm. Lines 8 and 9 define the information needed to configure the planner.PLANNING_NScontains the name of the namespace containing the nodemove_groupyou want to communicate with, andREFERENCE_FRAMEis the link used as reference for calculating the trajectory with respect to the end-effector (ee_link), in this case it would be the same as/ur10_1/world, but correct would be to take the link/ur10_1/base_linkas reference. -
Line 13: Initializes the
RobotCommander, which is used to control the robot, as specified in the code. You need to pass the namespace as a parameter and whichrobot_descriptionto use to define the robot, because at the moment there are three descriptions, namely the one forGazebo(robot_description) and the other two defined in theplanning_context.launchwhich are instantiated in their respective namespaces, so we have/ur10_1/robot_descriptionand/ur10_2/robot_description. -
Lines 18 and 24: An interface is created for a group of joints, in this case the
arminterface for the group of dynamicjointsof the UR10 cobot arm, and thegripperinterface for the joint that controls the gripper. It is through these interfaces that the planning of the trajectories and their execution is done (it is possible to do it through the robot interface as it contains these two interfaces, but it is clearer and more convenient to do it this way. -
Line 32: As it says in the comment,
display_trajectory_publisherpublishes in the topic/move_group/display_planned_paththat Rviz subscribes to in order to display trajectories, it is not necessary, but for debugging it is recommended. - Line 38: Just wait two seconds, make sure that the previous instances have been correctly loaded into the system, you must take into account that some of them instantiate nodes and if the computer you start on is slow, you can cause an undesirable situation.
-
Lines 40-50: Here you configure some options of the motion planner to use, by default it is RTT but this can be changed. The most important options are the last ones in lines 44, 45 and 46. Line 44 defines the reference link that will be used to perform the planning, lines 45 and 45 define the acceptable margin of error of the result obtained by the motion planner for position and orientation. You have to be careful because the smaller the error you define, the longer the planner will take to give an answer. The same procedure applies to the
gripperinterface. - Line 52: Here is the pick & place.
- Line 55: Once the task is finished, Pick & Place ends.
After the detailed description of the code, it is easy for the script to control another robot that is in a different namespace to change the value of the variable PLANNING_NS to the name of the namespace where the target robot is defined. If you run Pick & Place with both arms, you can see that they perform the task at the same time, with a small delay because one starts a little later than the other. You can run tests by starting the scripts at the wrong time and checking that they do indeed move at the same time.
 Creation of the scripts that will carry out the Pick & Place
cd scripts
touch four_arm_moveit_1.py
touch four_arm_moveit_2.py
touch four_arm_moveit_3.py
touch four_arm_moveit_4.py
-
File multirobot/four_arm_moveit/four_arm_moveit_manipulator/scripts/four_arm_moveit_1.py
-
File multirobot/four_arm_moveit/four_arm_moveit_manipulator/scripts/four_arm_moveit_2.py
-
File multirobot/four_arm_moveit/four_arm_moveit_manipulator/scripts/four_arm_moveit_3.py
-
File multirobot/four_arm_moveit/four_arm_moveit_manipulator/scripts/four_arm_moveit_4.py
Execution of the tests
To run the test:
- Terminal 1
roslaunch four_arm_moveit_manipulator four_arm_moveit_gazebo.launch - Terminal 2
roslaunch four_arm_moveit_manipulator four_arm_moveit_execution.launch - Terminal 3
rosrun four_arm_moveit_manipulator four_arm_moveit_1.py - Terminal 4
rosrun four_arm_moveit_manipulator four_arm_moveit_2.py - Terminal 5
rosrun four_arm_moveit_manipulator four_arm_moveit_3.py - Terminal 6
rosrun four_arm_moveit_manipulator four_arm_moveit_4.py
In the Gazebo terminal, when launching all the commands to perform the tests, the following warning is obtained:
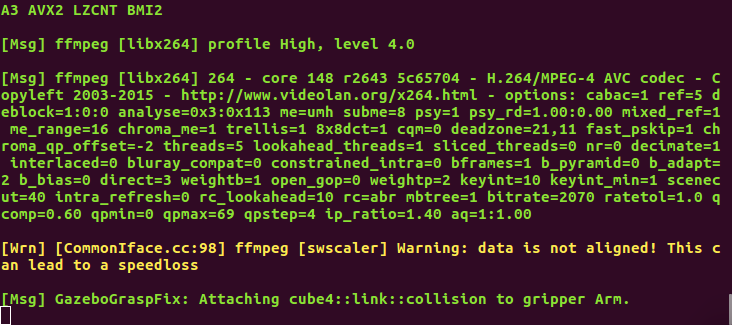
This is due to the fact that the system warns that the resources are insufficient to perform the simulation smoothly, which can lead to problems in its simulation speed that can affect its result.
 Final results information
-
Visual result in
Gazebo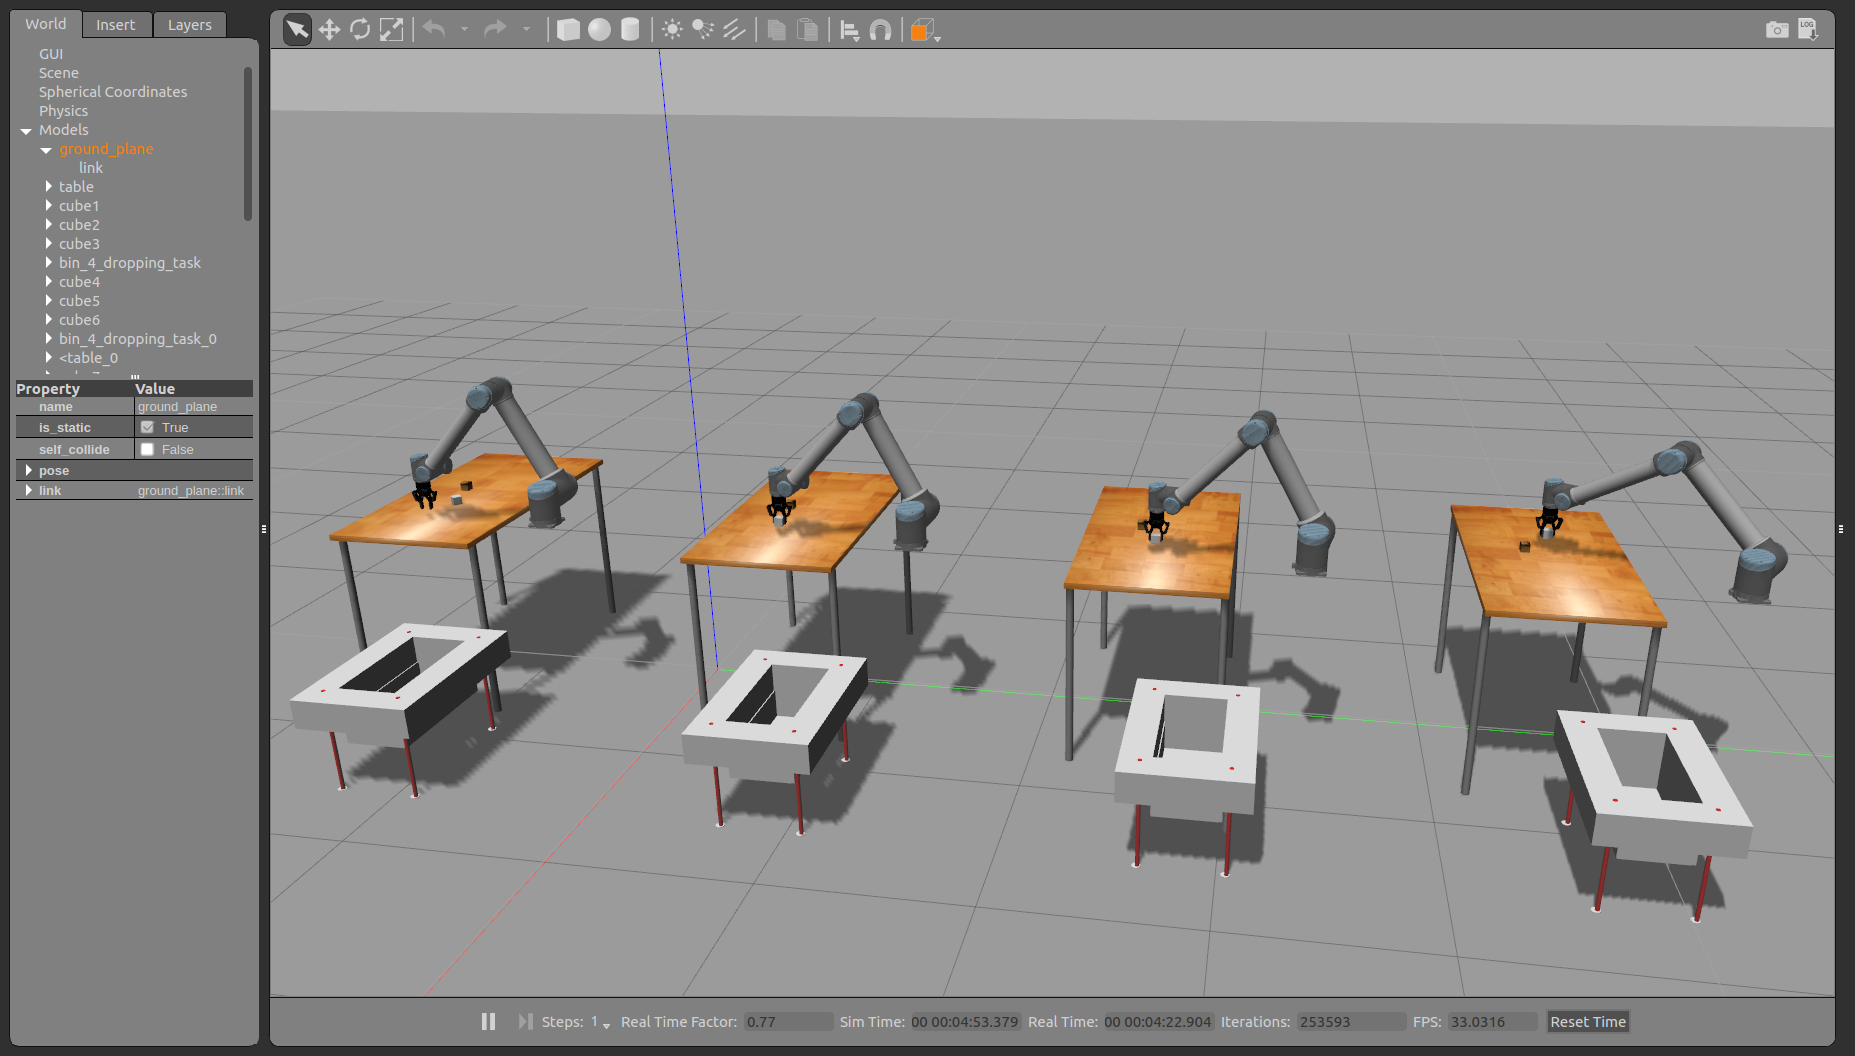
-
Scheme of the nodes and topics of the system
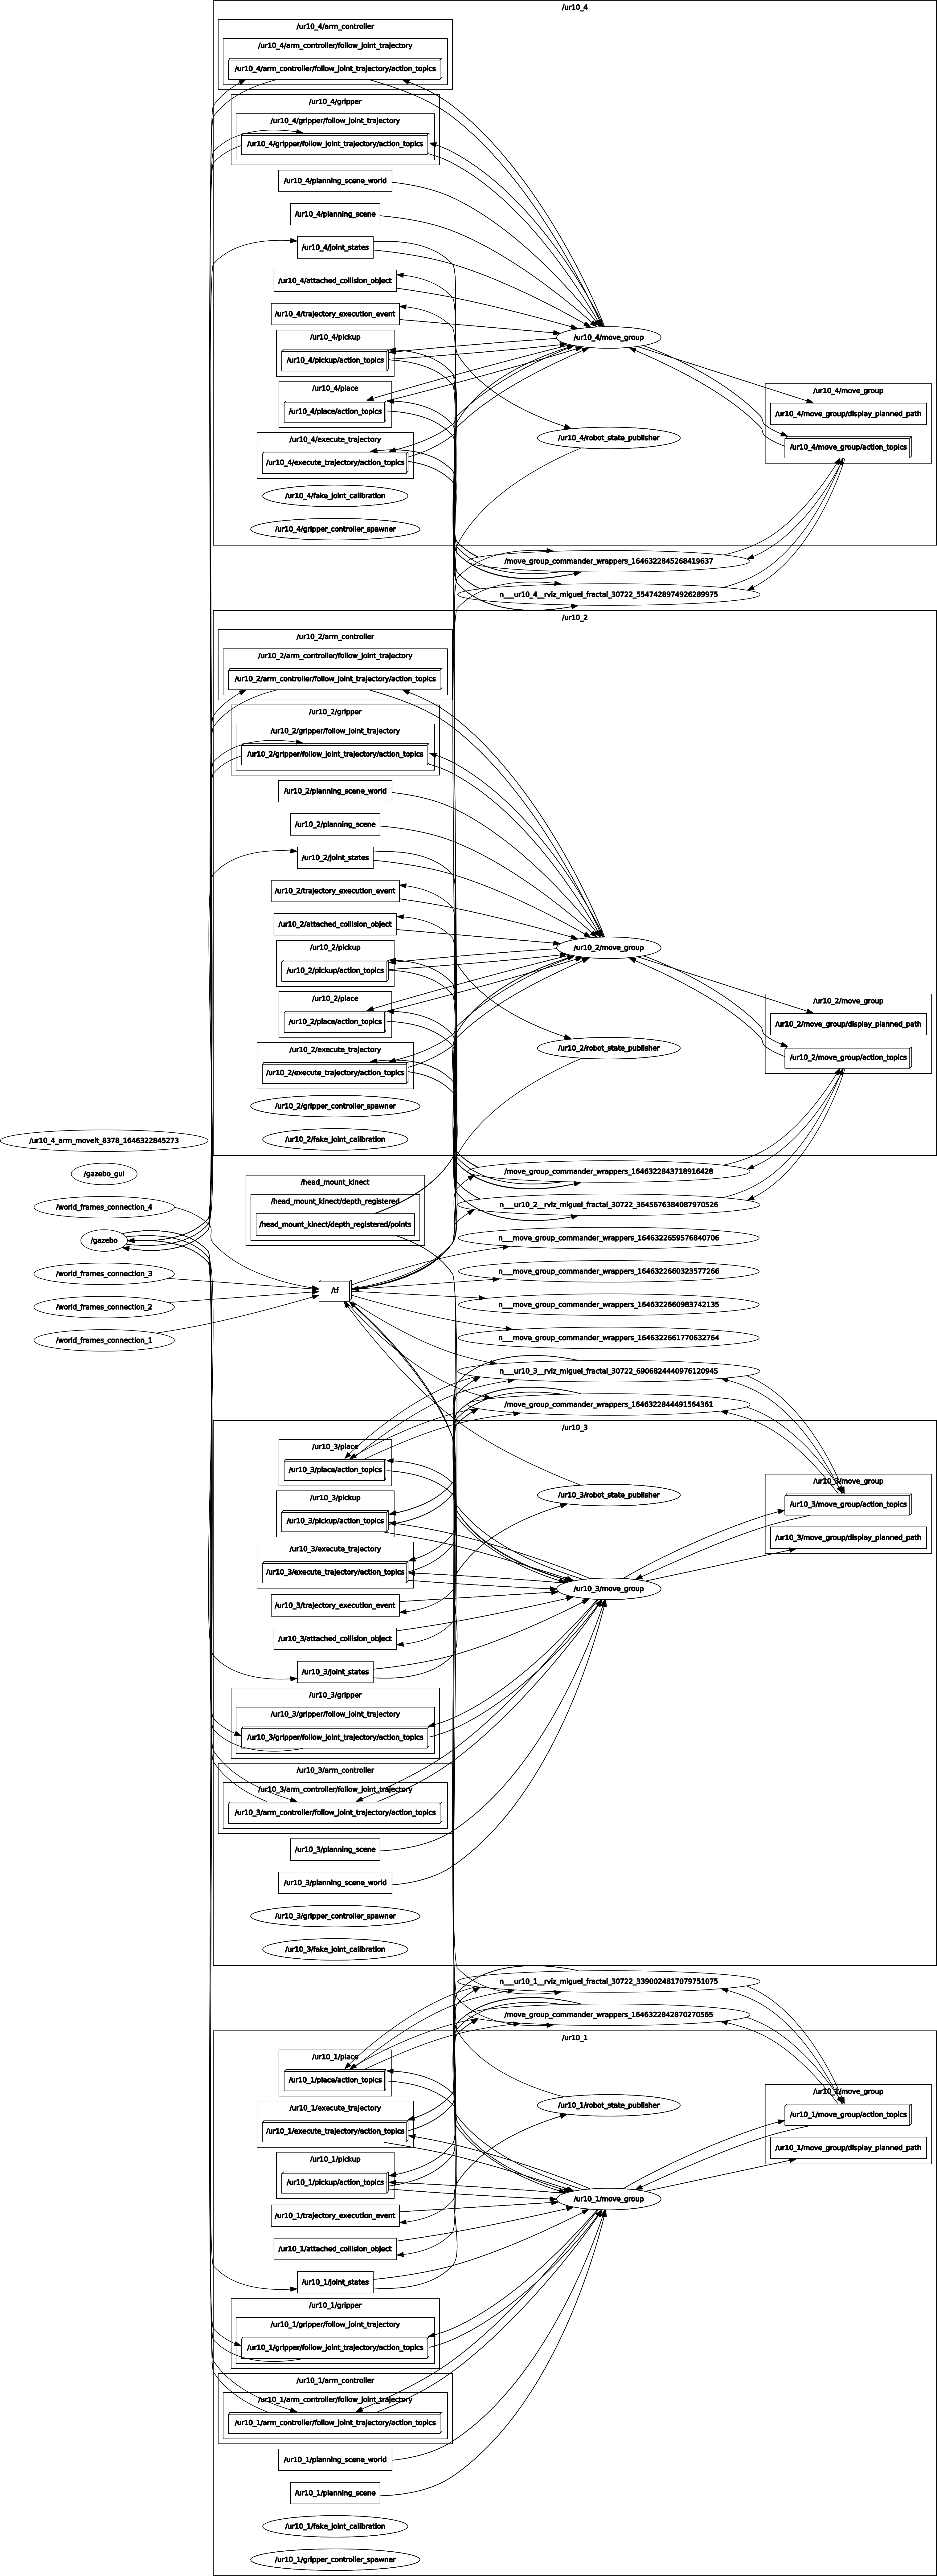
It checks if the communication between Gazebo and the replicas of MoveIt! works correctly. You can see two big groups where each cobot communicates with its assigned move_group. The communication with the controllers and the path of the transformations and values of the joins has a single origin, namely the Gazebo node, this is very important to avoid strange movements, depending on the frequency with which these disturbances occur.
The path part of the gazebo node is the only one that can be found in the topics /joint_states of both namespaces, the move_group node is also subscribed to this topic, then it reaches the robot_state_publisher node which performs the transformations and sends them through the topic /tf to which the move_group node is also subscribed, this is important because move_group uses the information coming from both for path planning.
- Tree of transformations of the robot model
